Ever wondered why serious sim racers obsess over their rig construction? The answer often lies in a deceptively simple material that has transformed how enthusiasts build their dream setups. Sim racing aluminum extrusion has become the gold standard for anyone seeking the perfect balance of strength, adjustability, and longevity in their cockpit design.
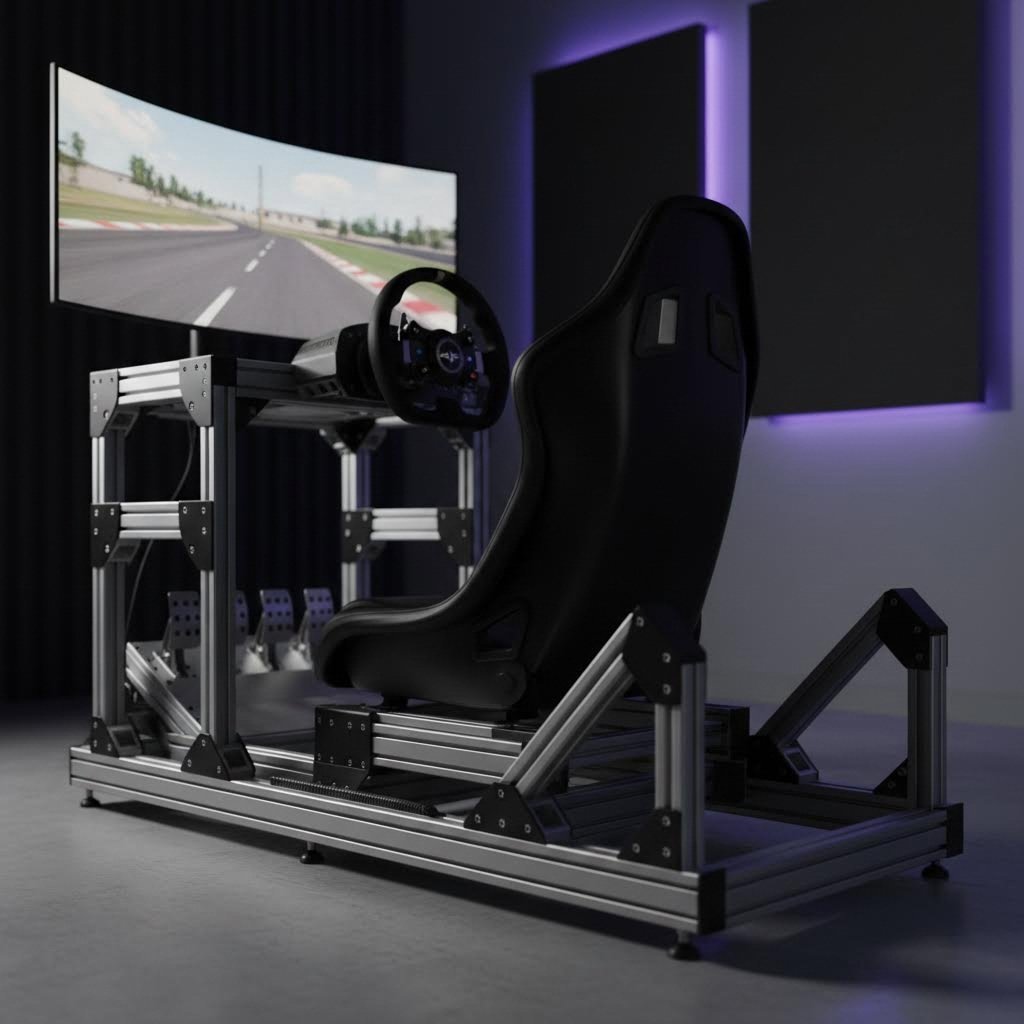
The rise of direct drive wheels changed everything. When the Open Sim Wheel project emerged from German forums, it delivered servo-motor-powered force feedback that existing cockpits simply couldn't handle. Suddenly, mounting a powerful wheel to a desk or flimsy stand wasn't just impractical—it was impossible. The sim racing community needed something better, and aluminum extrusion answered that call.
An aluminum sim rig offers extreme rigidity while remaining surprisingly lightweight. Unlike welded steel frames that are permanent and difficult to modify, or wooden rigs that can flex under high torque loads, an 8020 sim rig provides rock-solid stability with one crucial advantage: complete modularity. Need to adjust your pedal angle? Move your wheel deck forward? Add a monitor mount? These changes take minutes, not hours.
The term "80/20 rig" actually comes from the 80/20 rule—the assumption that 80% of results come from 20% of effort. This perfectly describes the aluminum extrusion sim rig experience: straightforward assembly with professional-grade results.
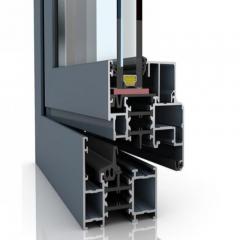
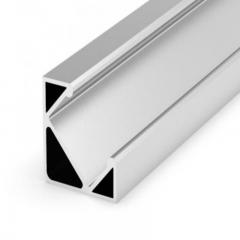
Think of T-slot aluminum profiles as industrial-strength building blocks for adults. Each profile features distinctive T-shaped channels running along its length. These slots accept specialized fasteners called T-nuts, which slide into position and lock securely when tightened. No welding required. No drilling into the aluminum itself. Just bolt, adjust, and tighten.
This modular approach means your aluminum sim racing rig can evolve alongside your equipment. Start with a basic wheel stand configuration, then expand to a full cockpit with integrated seat mounting. Add bass shakers later. Upgrade to triple monitors. The same core profiles support endless configurations.
Throughout this guide, you'll learn everything from decoding profile terminology like "4040" and "10 Series" to selecting the right slot system for your equipment. We'll cover load capacity calculations for high-torque direct drive wheels, compare sourcing options between specialized sim racing suppliers and industrial vendors, and provide practical DIY building guidance. Whether you're planning your first build or optimizing an existing setup, this comprehensive resource bridges the gap between manufacturer marketing and real-world builder knowledge.

Ready to dive into the numbers game? When browsing aluminum profile sim rig components, you'll encounter designations like 2020, 4040, and 8020—and they can feel overwhelming at first. Understanding these sizing conventions is essential for building a profile sim rig that matches your equipment and performance needs. Let's break down exactly what these numbers mean and when to use each profile type.
The naming system is actually simpler than it appears. Those numbers represent the cross-sectional dimensions of the profile in millimeters. A 4040 profile measures 40mm x 40mm, while a 40x80 (sometimes written as 4080) measures 40mm x 80mm. The alu 8020 designation you often see? That's an 80mm x 20mm rectangular profile—slim but surprisingly useful for specific applications.
Each size serves distinct purposes in sim racing construction. Here's how they typically break down:
| Profile Size | Typical Use in Sim Rigs | Strength Level | Best For |
|---|---|---|---|
| 2020 (20x20mm) | Cable management, light accessory mounts | Low | Button box brackets, small peripheral supports |
| 4040 (40x40mm) | Uprights, cross-members, secondary framing | Medium | Wheel deck supports, seat rails, general structure |
| 8020 (80x20mm) | Bracing, shifter mounts, handbrake plates | Medium-Low | Space-saving peripheral supports, diagonal reinforcement |
| 40x80 (4080) | Base rails, wheel deck beams, pedal decks | High | Direct drive wheel mounts, load-cell pedal platforms |
| 80x80 | Heavy-duty base frames, motion platform bases | Very High | Professional rigs, motion simulators, maximum rigidity needs |
When planning your 8020 profile selection, consider where forces concentrate during intense racing sessions. Your wheel deck experiences significant torque—especially with direct drive bases pushing 15-25+ Nm. This is where 40x80 profiles shine, providing the stiffness needed to eliminate flex without adding excessive bulk. According to Motedis, the 40x80L I-type profile has become a favorite among builders specifically for wheel uprights and deck construction.
For pedal plates, the same principle applies. Load-cell pedals can generate over 90kg of braking force, and that pressure needs a solid foundation. A 40x80 base rail running the length of your rig creates the backbone that prevents unwanted movement during hard braking zones.
Seat mounting presents different requirements. Here, 4040 profiles typically provide adequate support since forces distribute more evenly across the seat frame. However, if you're using a heavy seat or planning future motion platform integration, stepping up to 40x80 for the seat rails adds insurance against flex.
Now here's where confusion often creeps in. You've probably seen terms like "10 Series" or "40 Series" alongside metric measurements. What's the difference?
Series designations come from the broader category to which profiles belong, typically based on the T-slot width rather than the overall profile dimensions. As explained by 80/20 Inc, the naming convention follows this pattern: Series Number, by Profile Size, then any additional features.
The most common series you'll encounter include:
When working with 20 80 aluminum or any rectangular profile, pay attention to which series it belongs to. A 40x80 from the 40 Series uses different T-nut sizes than a 1.5" x 3" profile from the 15 Series. Mixing series within a single build creates compatibility headaches with brackets, connectors, and fasteners.
For most aluminum profile sim rig projects, sticking with 40 Series components simplifies sourcing and ensures all your accessories work together seamlessly. The ecosystem of I-type slot 8 fittings designed for 40 Series profiles offers exceptional variety—from corner brackets to joining plates—making it the practical choice for DIY builders seeking flexibility and future upgrade potential.
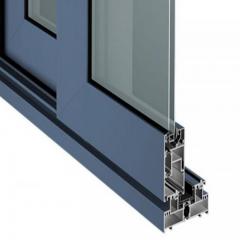
So you've got your profile sizes sorted—but there's another critical decision waiting. When shopping for your extruded aluminum sim rig components, you'll notice two distinct slot designs: T-slot and V-slot. While they might look similar at first glance, each system brings fundamentally different characteristics to your build. Understanding these differences helps you choose the right foundation for your specific racing setup.
What's the actual difference? T-slot profiles feature a T-shaped channel running along each face, designed specifically for T-nuts that slide into position and lock when tightened. V-slot profiles, by contrast, have a V-shaped groove that accommodates specialized V-wheels for linear motion applications.
According to Aluminum Land, T-slot aluminum extrusion is favored for its versatility in assembly and customization. The T-shaped slot design allows for easy attachment and adjustment of a wide range of connectors and accessories, facilitating swift modifications. This makes T-slot the clear winner for 80 20 sim rig builds where adjustability matters most.
V-slot profiles excel in different territory entirely. Their V-shaped groove provides exceptional rigidity and stability for applications demanding precise linear motion control—think 3D printers, CNC machines, and automation systems. The groove allows V-wheels to ride smoothly along the profile, creating a built-in rail system.
Here's why this distinction matters for your 80/20 sim rig project:
For sim racing applications, T-slot wins nearly every practical comparison. Your 8020 rig needs frequent adjustments—dialing in the perfect seating position, fine-tuning wheel height, repositioning pedals for different shoes or driving styles. T-slot's tool-free repositioning capability makes these tweaks painless.
That said, V-slot has a niche use case. Some builders incorporate V-slot rails specifically for sliding seat adjustments, creating a smooth mechanism for quick position changes between drivers. If you're building a shared rig for family or friends with different body sizes, a V-slot seat slider combined with T-slot primary framing offers the best of both worlds.
The bottom line? Build your main frame with T-slot profiles, and consider V-slot only for specialized linear motion components where its precision advantages justify the reduced flexibility.
Now imagine slamming the brakes at 100kg of force while your direct drive wheel fights back with 20+ Nm of torque. Can your aluminum profiles handle it? Absolutely—when sized correctly.
Understanding load capacity requires looking at how profiles respond to stress. According to Misumi's load capacity guidelines, allowable loads are defined as the force generating deflection equal to 1/1000 of the extrusion length. This gives us practical benchmarks for sim racing applications.
Consider these real-world numbers for a 500mm span (typical for wheel deck widths):
What does this mean for your extruded aluminum sim rig? A modern direct drive wheelbase like the Simagic Alpha Ultimate produces 25 Nm of peak torque. That translates to significant rotational forces on your wheel deck mounting points. As SimStaff notes, even an 8 Nm wheelbase—considered the sweet spot for most sim racers—delivers forces equivalent to high-performance sports cars.
For pedal loads, the math is more straightforward. Load-cell pedals commonly accept 90-136kg of maximum brake pressure. Your pedal deck needs to absorb this without flexing, which means 40x80 profiles oriented correctly provide ample margin.
The key factor most builders overlook? Span length matters enormously. That same 4040 profile supporting 122 kgf over 500mm drops to just 30 kgf over 1,000mm. Doubling your span length quarters your load capacity. This is why experienced builders add mid-span support brackets on longer runs rather than simply upsizing profiles.
When calculating your structural requirements, consider these factors together: your wheelbase torque rating, pedal maximum load, seat weight plus driver weight, and any future upgrades like motion platforms or bass shakers. Building with reasonable safety margins—using 40x80 for primary load-bearing members and 4040 for secondary structure—ensures your 8020 rig stays rock solid through every racing session.
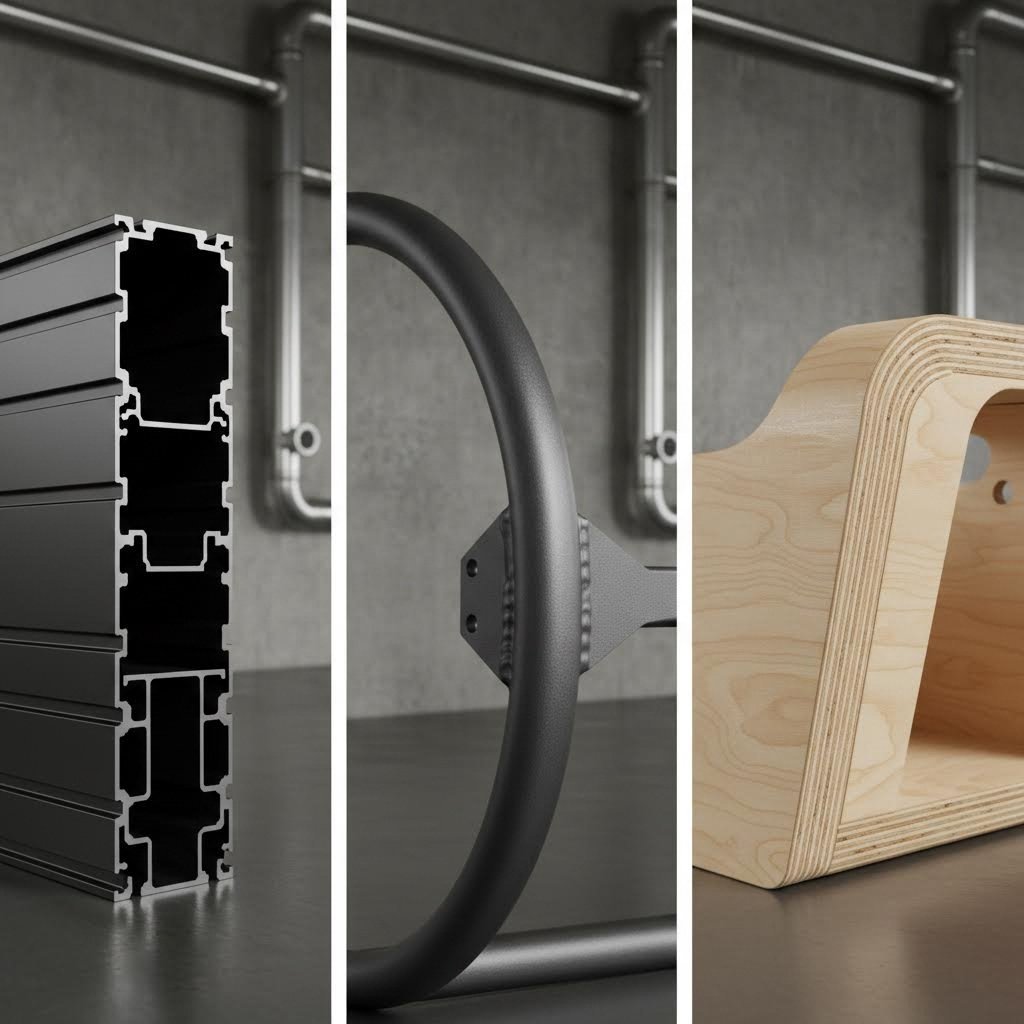
You've seen the profile sizes and understood load capacities—but here's the question that trips up many first-time builders: is aluminum extrusion actually the right choice for your setup? While aluminium sim rig construction dominates the enthusiast community, steel tube frames and wooden cockpits each bring legitimate advantages worth considering. Let's cut through the marketing noise and examine what each material truly offers.
Steel tube frames have powered sim racing for decades. Companies like Trak Racer built their reputation on round steel tube construction—and for good reason. Steel offers exceptional rigidity at lower material costs than aluminum profiles. The Alpine Racing TRX, co-developed with the Alpine F1 Team, uses 2-inch round steel construction capable of handling 180kg of braking force without flexing.
Steel's primary limitation? Adjustability. Once welded, steel frames are essentially permanent. Moving your pedal position by 2 inches means drilling new mounting holes—not sliding T-nuts to a new position. For racers who've dialed in their exact driving position, this isn't a problem. For those still experimenting, it's a significant constraint.
Wooden cockpits occupy a fascinating middle ground. DIY builders have long used MDF and plywood due to lower material costs and easy cutting with basic tools. However, premium plywood rigs like the Rock Solid Rigs RSR-21—developed by an F1 composites engineer—demonstrate that wood can actually outperform aluminum in rigidity when properly engineered. The layering technique creates measurably stiffer platforms than standard profile construction.
That said, wood comes with humidity sensitivity concerns and fewer mounting options compared to T-slot profiles. Premium wooden rigs also sacrifice the infinite adjustability that makes a sim racing aluminium rig so appealing for evolving setups.
When evaluating materials, you need honest data—not manufacturer claims. Here's how each option actually performs across the factors that matter most:
| Factor | Aluminum Extrusion | Steel Tube Frame | Wood/Plywood |
|---|---|---|---|
| Weight | Light to moderate (rig typically 20-35kg) | Heavy (35-50kg+ depending on gauge) | Moderate (varies by thickness) |
| Rigidity | Excellent with proper profile sizing | Outstanding—especially thick-gauge tube | Good to excellent (premium layered plywood) |
| Adjustability | Infinite—T-nuts slide anywhere | Limited—fixed drill points only | Limited—pre-drilled positions |
| Cost | $600-$1,200 for quality rigs | $400-$1,000 (often less than aluminum) | $200-$800 (DIY) / $800+ (premium) |
| DIY Difficulty | Easy—no welding, bolt-together assembly | Hard—requires welding equipment and skills | Moderate—cutting and drilling required |
| Longevity | 10+ years with proper maintenance | 10+ years (rust prevention needed) | 5-10 years (humidity can cause issues) |
As SimRacingCockpit.gg notes in their testing, the cheapest material to prevent flex while maintaining extendability is extruded 8020 profile aluminum. While the profile might not look as sleek as welded tube steel, experienced sim racers consistently choose alu sim rig construction for its upgrade flexibility.
Here's where the decision gets interesting. A rigmetal sim rig or rig metal sim cockpit from established brands arrives ready to assemble with pre-drilled mounting patterns, sim-specific hardware kits, and tested compatibility with popular wheelbases and pedals. You're paying for engineering, convenience, and support.
DIY aluminum extrusion builds tell a different story. Sourcing profiles from industrial suppliers can reduce material costs by 30-50% compared to sim racing specialists. However, you'll spend significant time planning cuts, selecting appropriate brackets, and solving compatibility puzzles yourself. According to EveZone's analysis, a DIY build might seem cheaper upfront, but costs can spiral with mistakes, tool purchases, and material price variations.
The sweet spot for many builders? Starting with a pre-built metal rig frame from a reputable manufacturer, then expanding with custom aluminum extrusion additions as needs evolve. This approach provides immediate racing capability while preserving upgrade flexibility.
Honesty matters here: aluminum profiles aren't universally superior. Consider alternatives when:
That said, for the vast majority of home sim racers—especially those running direct drive wheels and load-cell pedals—aluminum extrusion remains the practical choice. The combination of excellent rigidity, infinite adjustability, and upgrade-friendly design makes it the material that grows with your passion rather than limiting it.
You've chosen aluminum extrusion for your build—smart move. But here's where theory meets reality: which profile configuration actually works with your specific wheelbase and pedals? The answer depends entirely on what you're mounting, how much force it generates, and where you plan to take your setup in the future. Let's match your equipment to the right alu profile sim rig design.
Your wheelbase is the starting point for every profile decision. Why? Because as Boundless Racing emphasizes, a rigid chassis keeps everything in check—your wheelbase, pedals, seat, and monitors—so there is no flex, no unwanted movement, and no loss of feedback. Without matching your profiles to your equipment's force output, you're undermining the entire investment.
Direct drive wheelbases fall into distinct tiers that demand different structural approaches:
For pedal mounting, think about pressure rather than torque. Load-cell brake pedals commonly accept 90-136kg of maximum force. Your pedal deck needs to absorb this straight downward pressure without flexing backward. A 40x80 profile running the full pedal plate width—mounted with heel plate support—creates the stable foundation that translates your braking input directly into the simulation.
Hydraulic pedals like the Simtag or Heusinkveld Ultimate+ present an additional consideration: weight. These premium units can weigh 15-20kg themselves, requiring beefier mounting rails than lighter load-cell alternatives.
Here's what makes an aluminum racing sim cockpit truly valuable: it grows with you. Unlike fixed-frame alternatives, your profile rig adapts as your equipment evolves and your ambitions expand. This modularity isn't just marketing—it's a fundamental design advantage that protects your investment for years.
Imagine starting with a basic wheel stand setup. Six months later, you're adding a dedicated seat. A year after that, you want triple monitors. With welded steel? That's three different rigs. With aluminum extrusion? It's the same core structure, expanded systematically.
The most common upgrade paths follow predictable patterns:
The key to maximizing upgrade potential? Overbuild slightly from the start. Using 40x80 profiles where 4040 would technically suffice costs marginally more today but eliminates rebuilding when your 8 Nm wheelbase becomes a 20 Nm monster. Leave expansion room in your initial design—extra profile length is far cheaper than restructuring later.
With your equipment matched and upgrade path mapped, the next question becomes practical: what tools do you actually need, and what mistakes should you avoid during assembly?
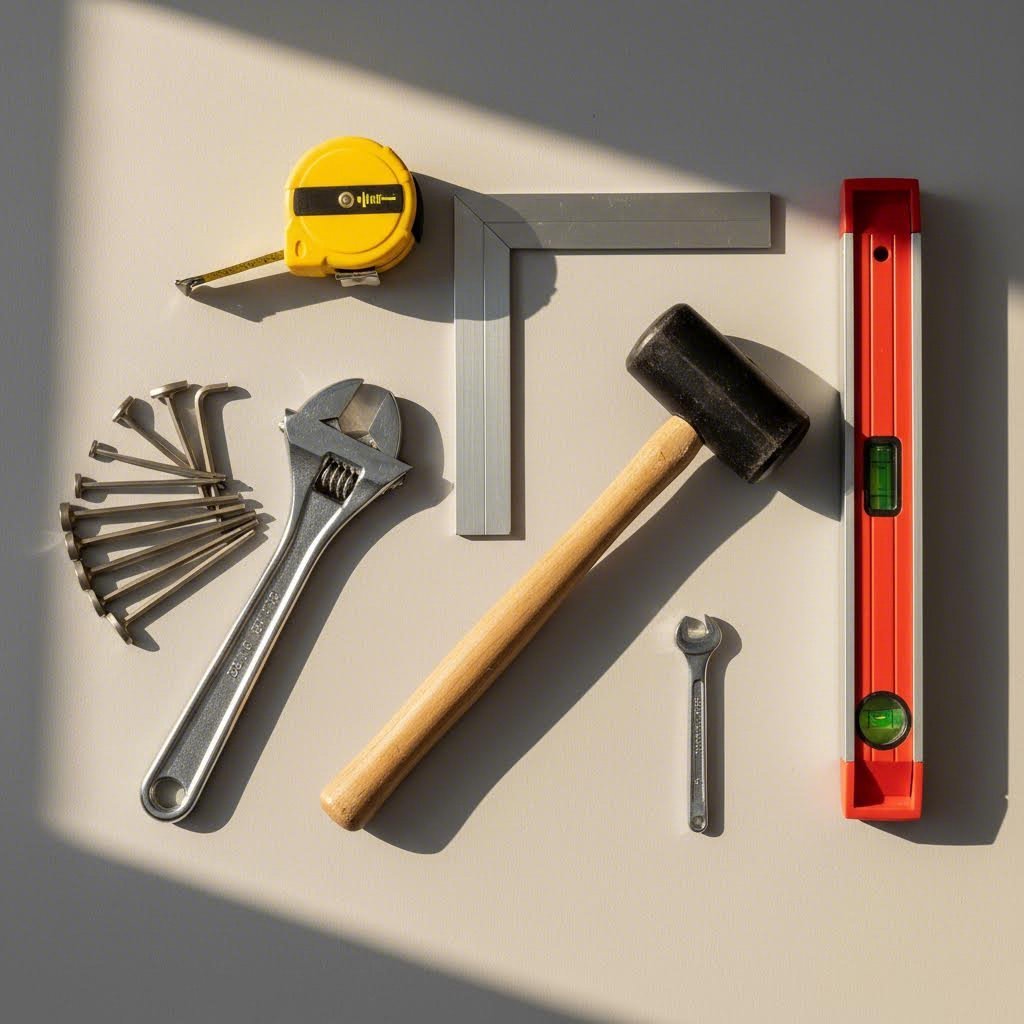
Ready to turn those aluminum profiles into your dream cockpit? Building an aluminum extrusion sim rig from scratch is surprisingly accessible—even if you've never assembled anything more complex than IKEA furniture. The key lies in having the right tools on hand and understanding the pitfalls that trip up first-time builders. Let's walk through exactly what you need and how to avoid the mistakes that waste time and money.
The beauty of T-slot construction is its simplicity. As noted by Crafty Amigo, aluminum extrusion kits often come with the fasteners and connectors you need—but you'll still need tools to put everything together. Here's what belongs in your assembly toolkit:
Required Tools:
Optional But Helpful Equipment:
Working with pre-cut profiles from your supplier eliminates the need for cutting equipment entirely. Most 8020 sim rig plans specify exact lengths, and reputable suppliers will cut to your specifications—often with tolerances under 0.5mm. This service typically adds minimal cost while saving you the expense of specialized blades and the risk of inaccurate cuts.
Even experienced builders stumble on these issues. Learning from others' errors saves hours of frustration and potential component replacement.
Over-tightening T-nuts: This is the number one mistake beginners make. T-nuts are designed to grip the inside of the T-slot channel when moderately tightened—they don't need maximum force. Cranking down too hard cracks the T-nut body or strips the bolt threads. The result? A fastener that feels tight but actually has zero holding power. Use a torque wrench set to manufacturer specifications, or tighten until snug plus a quarter turn.
Improper squaring techniques: Your 80 20 sim rig plans assume perfect 90-degree corners. Reality rarely cooperates without deliberate effort. Before fully tightening any joint, check it with a carpenter's square. As one builder describes in their detailed build log, going back to reinforce spots that feel loose or unstable is essential—and checking all connectors ensures no part of the frame shifts or wobbles under pressure.
The proper technique: hand-tighten all bolts in a section first, verify square alignment, then progressively tighten in a star pattern (similar to wheel lug nuts). This prevents one tight bolt from pulling the assembly out of square.
Inadequate bracing: Beginners often underestimate how much force direct drive wheels and load-cell pedals generate. A frame that feels solid when empty can flex dramatically during hard braking or high-torque force feedback events. Add diagonal bracing to any span exceeding 500mm, especially on wheel deck uprights and pedal plate supports. Corner gussets at critical joints prevent the twisting that ruins immersion.
Ignoring the base first: Some builders get excited about mounting their wheel and rush past the foundation. Resist this urge. Crafty Amigo's build guide emphasizes starting with the frame's base because it's the foundation of your entire simulator—a stable base is crucial for keeping things steady during intense races. Level your base rails, square the corners, and verify everything before moving upward.
How long will your diy sim rig plans take to execute? That depends heavily on your experience level and how much pre-planning you've done.
Complete beginners with no prior assembly experience should budget 6-10 hours for a basic cockpit build. This includes time for reading instructions, double-checking measurements, and correcting inevitable minor errors. You can absolutely accomplish this—T-slot assembly requires no specialized skills—but patience matters more than speed.
Intermediate builders with some mechanical experience can complete the same build in 3-5 hours. Familiarity with tools and confidence in measurements accelerates every step.
Experienced builders who've assembled aluminum extrusion projects before often finish in 2-3 hours. They know the tricks: pre-staging all hardware, working systematically from base to accessories, and checking square at every stage.
Many builders following diy sim rig plans free from community resources find that the planning phase takes longer than actual assembly. Measure twice, order once. Verify your 80 20 sim rig plans account for your specific equipment mounting patterns before placing orders. A misplaced drill hole in your CAD design costs nothing to fix—a wrong cut in physical aluminum means reordering.
The good news? Unlike welded steel or cut plywood, aluminum extrusion forgives mistakes. Assembled something in the wrong position? Loosen the bolts, slide the T-nuts to the correct spot, and retighten. This forgiving nature makes T-slot construction ideal for first-time rig builders who want professional results without professional risk.
You've mapped out your dream build and assembled your toolkit—but where do you actually buy the aluminum profiles? This decision shapes everything from your budget to your build timeline. Two distinct paths exist: dedicated sim racing suppliers who specialize in cockpit components, and industrial aluminum vendors who sell raw materials at bulk pricing. Each approach offers genuine advantages worth weighing against your priorities.
Sim racing specialists like Sim-Lab, Trak Racer, and Rigmetal have built their businesses around racers' specific needs. When you order from these vendors, you're buying more than aluminum—you're purchasing an engineered solution. Their profiles arrive pre-cut to tested specifications, with mounting patterns pre-drilled for popular wheelbases and pedals.
The rigmetal basic package, for example, includes everything from T-nuts to corner brackets sized specifically for sim racing applications. Sim-Lab's offerings come with laser-cut precision that ensures zero movement between parts once constructed. This engineering saves hours of planning and eliminates compatibility guesswork.
Industrial suppliers like 80/20 Inc, Misumi, or Motedis take a different approach. They sell 8020 aluminum profile by the meter at significantly lower per-unit costs—often 30-50% less than sim-specific vendors. However, you're responsible for calculating exact lengths, selecting appropriate fasteners, and solving mounting challenges yourself.
Consider what each path actually delivers:
The smartest builders often combine both approaches. Purchase your main frame components—wheel deck, pedal plate, seat rails—from sim racing specialists who've already solved the engineering challenges. Then source extension profiles, accessory brackets, and future upgrades from industrial vendors at lower cost.
For your 80 20 rig base, this hybrid strategy delivers tested compatibility where it matters most while preserving budget flexibility for customization. A complete Sim-Lab GT1 Pro frame paired with industrial-sourced monitor uprights and accessory rails often costs less than buying everything from one source—with better results.
International buyers face additional considerations. Lead times from European suppliers like Sim-Lab to North American addresses can stretch 2-4 weeks, with freight adding $100-200 to orders. Conversely, North American builders might find better value sourcing locally from 80/20 profiles distributors, then purchasing only sim-specific mounting hardware from overseas specialists.
Before ordering, verify these critical details: slot compatibility between suppliers (40 Series vs 15 Series), shipping weight and dimensional charges for long profiles, and return policies for incorrect cuts. One mismatched T-nut size can delay your entire build while waiting for replacement hardware.
With your sourcing strategy locked in, the final piece falls into place: choosing a rig design that maximizes your space, equipment, and driving style preferences.
You've sourced your profiles and gathered your tools—now comes the exciting part: choosing the actual design that transforms raw aluminum into your personal racing cockpit. Whether you prefer the laid-back recline of a formula car or the upright aggression of a GT position, proven sim rig blueprints exist to guide your build. Let's explore the most popular configurations and how to adapt them to your unique space and equipment.
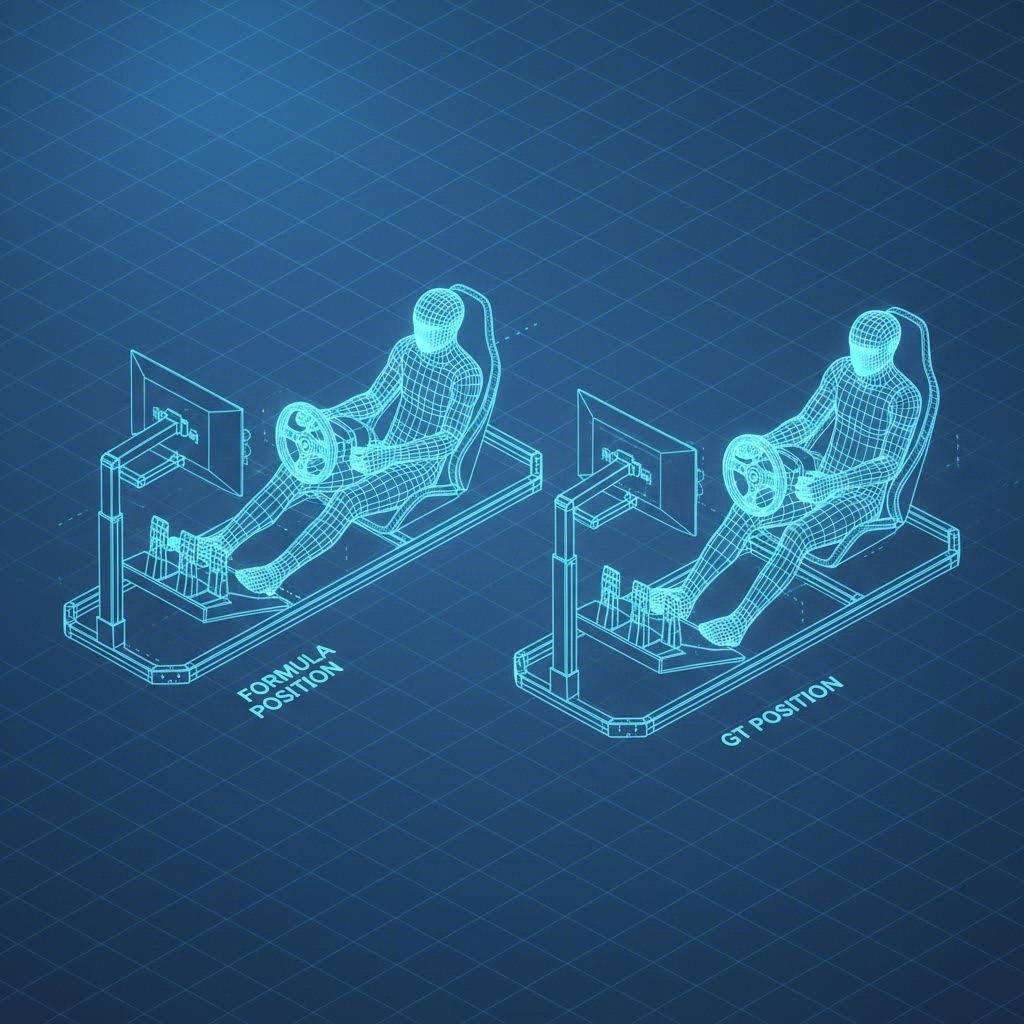
Sim rig designs generally fall into three distinct categories, each optimizing for different racing experiences and driver preferences.
Formula-Style Cockpits: These designs place you in a reclined position with legs extended forward and the wheel mounted high—mimicking an F1 or IndyCar seating position. The backrest angle typically sits between 20-35 degrees from horizontal. This configuration excels for open-wheel racing simulations where peripheral vision matters less than the sensation of speed and precision steering inputs. Formula rigs require longer base frames to accommodate the extended leg position and often feature lower seat mounting heights.
GT-Style Cockpits: The most popular choice among sim racers, GT configurations position you more upright—similar to road cars or touring car racing. According to Asetek's seating guide, your back should be well-supported with legs slightly bent when pressing the pedals. This position suits longer racing sessions and provides better screen visibility for most monitor setups. GT sim rig designs typically use more compact base dimensions, making them ideal for space-constrained rooms.
Hybrid Configurations: Why choose when you can have both? Many sim racing cockpit plans now incorporate adjustable seat mounts that slide between formula and GT positions. This flexibility proves invaluable for households with multiple drivers or racers who enjoy both F1 and endurance racing simulations. Hybrid designs add complexity to your build but maximize versatility.
The sim racing community has developed extensive libraries of free rig plans over the years. Forums like iRacing, Race Department, and dedicated subreddits host user-submitted designs ranging from basic wheel stands to elaborate motion-ready platforms. These community-driven resources let you learn from builders who've already solved the problems you'll encounter—what works, what doesn't, and what they'd change in hindsight.
Found the perfect sim rig designs online but your room doesn't quite match the blueprint dimensions? Modification is not only possible—it's expected. Most experienced builders treat published plans as starting points rather than rigid specifications.
Before committing to cuts, consider these key design factors:
When adapting existing race simulator plans, work backwards from your constraints. If your room limits total length, consider a more upright GT position that shortens the base frame. Ceiling height restrictions? Mount monitors lower and adjust seat height accordingly. The modular nature of aluminum extrusion means every dimension can flex to match your reality.
Gamer Gear Direct recommends grabbing a tape measure and figuring out the dimensions you need for comfort and control—including wheel height, pedal distance, and base width—before modifying any published plans. This preparation prevents costly mistakes and ensures your final build feels tailored to your body rather than forced into someone else's specifications.
The best sim rig blueprints share one common trait: they come from builders who documented their learning process. Seek out build logs with photos showing the evolution from concept to completion. These real-world examples reveal practical solutions to challenges that sterile CAD drawings never address—like routing cables cleanly, mounting awkward accessories, or reinforcing joints that flexed unexpectedly. With your design chosen and adapted, you're ready to take the final step toward your ultimate aluminum cockpit.
You've absorbed the terminology, compared the materials, and explored proven designs—now it's time to transform that knowledge into action. Building your sim racing aluminum rig isn't just about assembling profiles; it's about making informed decisions at every step that align with your equipment, space, and long-term racing ambitions. Let's consolidate everything into a clear action plan that gets you from planning to racing as efficiently as possible.
Before placing a single order, run through these critical decision points that shape every successful 8020 cockpit build:
Your aluminum sim cockpit should reflect how you race today while anticipating how you'll race tomorrow. That 8 Nm wheelbase might become a 20 Nm monster within a year. Those single-monitor sessions could evolve into triple-screen immersion. Building with headroom—slightly overspecified profiles, extra base rail length, pre-planned mounting points for future accessories—costs marginally more upfront but eliminates expensive rebuilds later.
Ready to move from planning to building? Here's your actionable roadmap:
Step 1: Finalize your design. Download community sim rig blueprints or sketch your own configuration. Measure your room, verify clearances, and confirm every dimension before ordering.
Step 2: Create your cut list. Document every profile length, quantity, and size. Double-check mounting hole positions for your specific wheelbase and pedal set.
Step 3: Source strategically. Request quotes from both sim racing specialists and industrial suppliers. Compare total costs including shipping, hardware kits, and any machining services.
Step 4: Gather tools and workspace. Clear adequate floor space, organize your toolkit, and allocate sufficient time—rushing assembly leads to squaring errors and stripped fasteners.
Step 5: Build systematically. Start with the base frame, verify level and square at every stage, and work upward methodically. Save wheel and pedal mounting for last to prevent damage during construction.
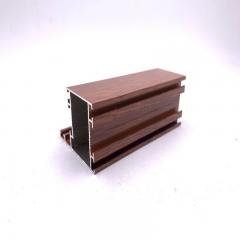
For builders with unique requirements—non-standard profile dimensions, specialized mounting patterns, or custom aesthetic finishes—working with aluminum manufacturers who offer deep processing services becomes invaluable. Companies like Shengxin Aluminium provide precision cutting, drilling, and surface treatments including anodizing and powder coating. According to Can Art Aluminum, anodizing creates a stable anodic oxide layer with outstanding UV stability and abrasion resistance—ideal for rigs that will see years of intense use. Powder coating, meanwhile, offers unlimited color options and excellent corrosion protection. These finishing options let you create an aluminum sim racing cockpit that performs flawlessly while matching your room's aesthetics.
The true value of aluminum extrusion lies not in what you build today, but in what you can become tomorrow. Every T-slot is a future possibility—a monitor mount, a bass shaker bracket, a motion platform connection point. You're not just assembling a rig; you're investing in a racing platform that evolves alongside your passion for years to come.
Whether you're building your first race simulator or upgrading an existing setup, the knowledge you've gained through this guide positions you to make confident decisions. Your sim racing aluminum rig awaits—profiles cut, T-nuts ready, and countless virtual kilometers ahead. The only question remaining: when do you start building?
An 8020 aluminum profile sim rig is a modular racing cockpit built using T-slot aluminum extrusion profiles. The name '8020' comes from the 80/20 rule, reflecting how these rigs deliver excellent results with straightforward assembly. The T-shaped channels along each profile accept specialized T-nuts that slide into position and lock when tightened, allowing infinite adjustability without welding or drilling. This system lets you easily modify pedal angles, wheel height, and seat position—making it ideal for evolving setups and equipment upgrades.
Building your own aluminum sim rig can save 30-50% compared to pre-built options when sourcing from industrial suppliers. Many DIY builders report saving more than 50% versus commercial alternatives like Next Level Racing rigs. However, the real value extends beyond cost savings—you gain complete customization control, exact fitment for your specific equipment, and the ability to modify the rig as your setup evolves. The trade-off is time investment (6-10 hours for beginners) and the responsibility of planning cuts and solving compatibility challenges yourself.
Profile size depends on your equipment's force output. For entry-level direct drive wheels (5-8 Nm), 4040 profiles work well for uprights with 40x80 for wheel decks. Mid-range wheelbases (12-15 Nm) benefit from 40x80 for both deck and uprights with corner bracing. High-end units producing 20+ Nm require 80x80 uprights with reinforced mounting plates. For pedal plates supporting load-cell brakes generating 90-136kg of force, 40x80 profiles oriented correctly provide excellent stability without flex.
The sim racing community offers extensive free resources for rig designs. Forums like iRacing, Race Department, and dedicated subreddits host user-submitted plans ranging from basic wheel stands to motion-ready platforms. Sites like OpenSimRacing.com provide metal sim rig plans specifically designed for aluminum extrusion builds. These community-driven blueprints include detailed cut lists, hardware specifications, and build logs showing real-world assembly—helping you learn from builders who've already solved common challenges.
The optimal approach combines both sources. Sim racing specialists like Sim-Lab and Rigmetal offer pre-drilled mounting patterns, tested compatibility with popular wheelbases, and complete hardware kits—saving significant planning time. Industrial suppliers provide raw profiles at 30-50% lower cost but require you to calculate cuts and solve mounting challenges independently. Many experienced builders purchase main frame components from specialists for critical compatibility, then source extension profiles and accessories from industrial vendors for cost savings.


 un service en ligne
 0086 136 3563 2360
 sales@sxalu.com
 +86 136 3563 2360
 français
 English
 Deutsch
 русский
 español
 português
 العربية
 ไทย
ไทย Việt
Việt Українська