You wake up on a cold morning, pull back the curtains, and there it is again: water streaming down your windows. The glass is fogged, the sills are damp, and that familiar musty smell lingers in the air. Sound familiar? Perhaps you've noticed dark spots forming in the corners of your bedroom, or your home feels stuffy despite keeping everything sealed tight. These frustrations are incredibly common in modern homes, and they all point to one underlying issue: inadequate ventilation.
The good news? There's a simple, effective solution that many homeowners overlook. uPVC window trickle vents offer a straightforward answer to these persistent problems, working quietly in the background to keep your home fresh and dry.
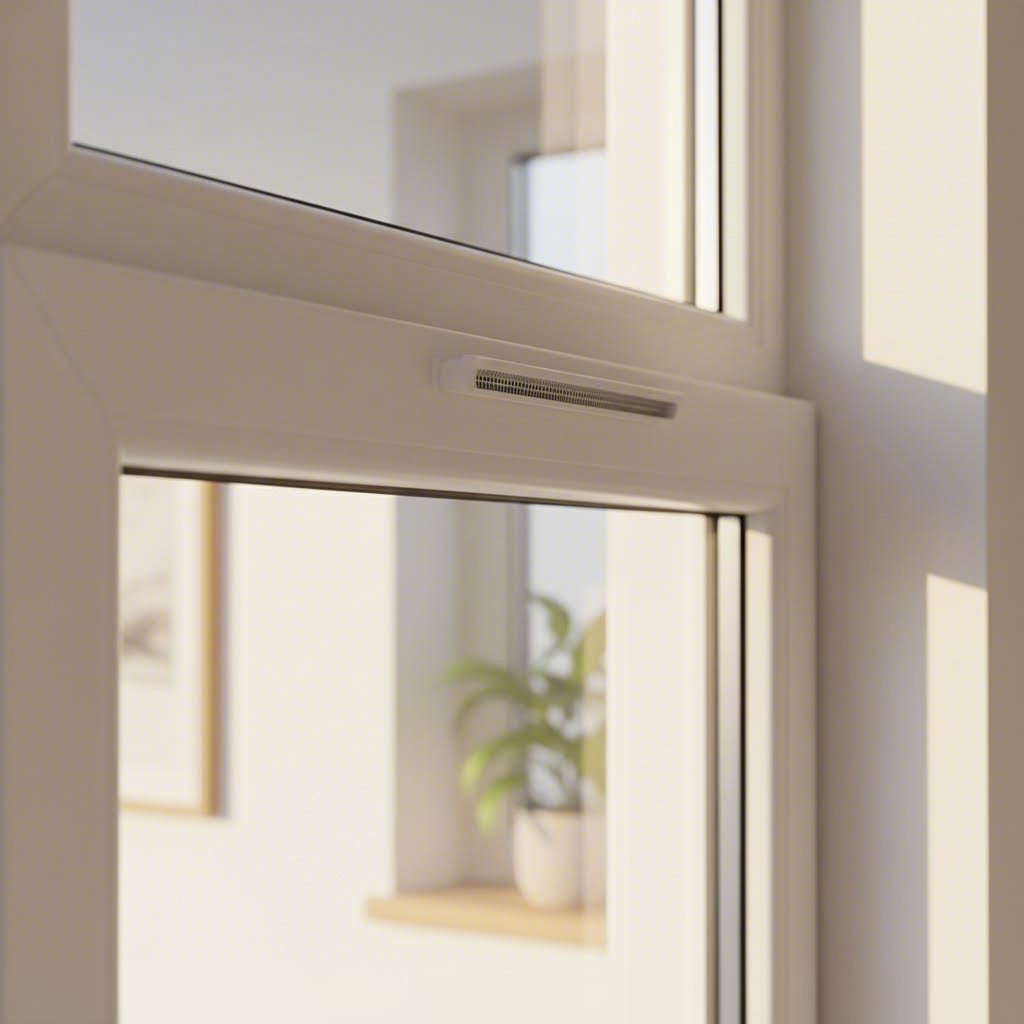
Trickle vents are background ventilators integrated into window frames that allow a constant, controlled trickle-feed of fresh air from outside into your home without needing to open the window.
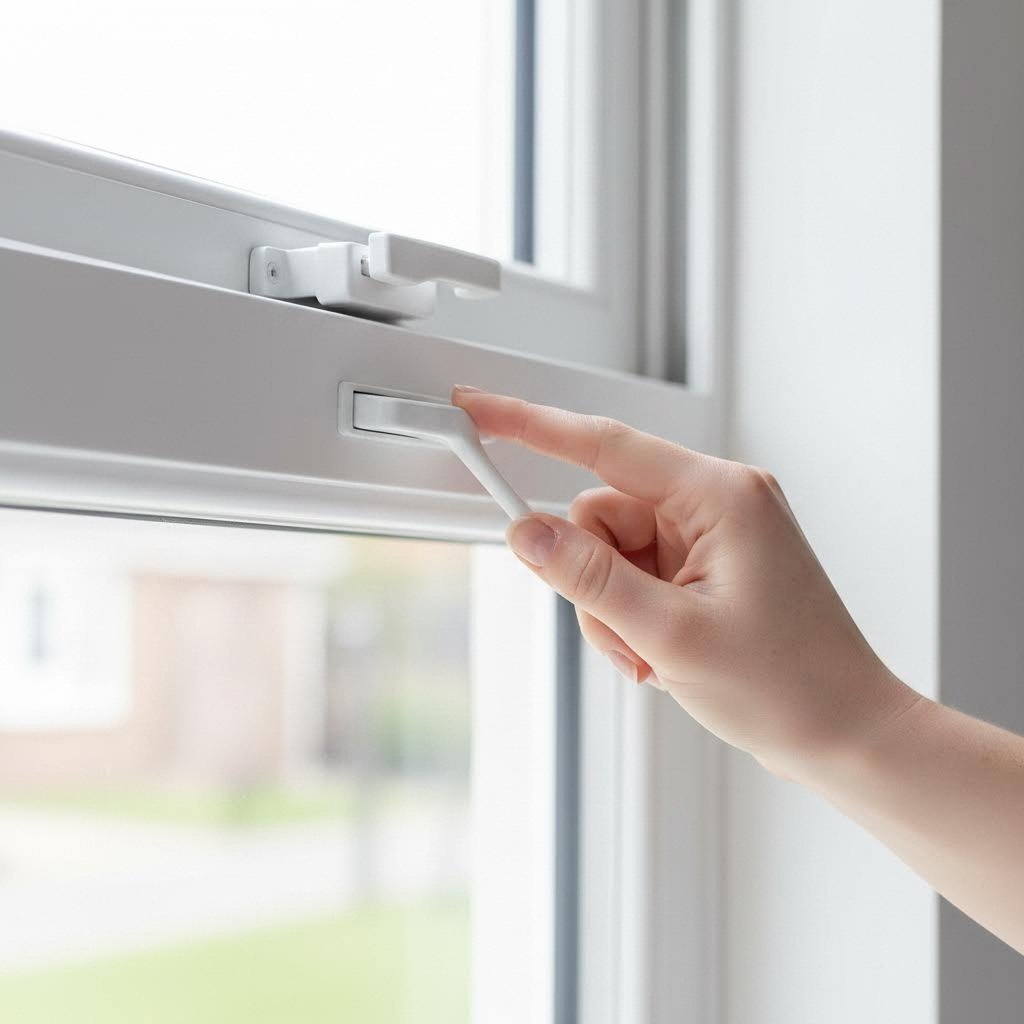
Imagine a small, narrow slot built into the top of your window frame. That's essentially what a trickle vent is. The design features staggered openings on both the interior and exterior sides of the frame, with uPVC window trickle vent covers that you can open or close as needed. Although these covers give you control, the vents are designed to remain open continuously for optimal air circulation.
The mechanism is beautifully simple. When closed, your windows create an airtight seal. When the trickle vent is open, fresh outdoor air enters through the external slot, travels through the frame, and emerges inside your room. This gentle airflow displaces stale, moisture-laden indoor air without creating uncomfortable drafts or significantly affecting your home's temperature.
According to Everest, trickle vents for uPVC windows work passively, meaning they require no electricity or mechanical parts. They simply harness natural pressure differences between indoors and outdoors to maintain constant air exchange.
Here's the paradox of energy-efficient housing: the better your windows and insulation perform, the more airtight your home becomes. While this keeps heating bills down, it also traps moisture inside with nowhere to escape.
Consider your daily activities. Showering, cooking, drying laundry, even breathing releases significant amounts of water vapor into your indoor air. In older, draftier homes, this moisture naturally escaped through gaps and cracks. In modern, well-sealed properties? It stays trapped, condensing on cold surfaces like windows and exterior walls. This creates the perfect breeding ground for mould, which poses serious health risks.
This is precisely why trickle vents uPVC windows have become essential rather than optional. The UK Building Regulations Approved Document Part F, updated in June 2022, specifically addresses this challenge. The regulations require background ventilation in most new and replacement windows to ensure adequate indoor air quality as buildings become increasingly airtight.
Do uPVC windows need trickle vents? In most cases, yes. The regulations state that when replacing windows without existing vents, you must demonstrate that ventilation will not be worsened by the new installation. Since modern uPVC windows are typically more airtight than older frames, installing trickle vents is usually necessary to meet compliance standards.
The benefits extend beyond mere regulatory compliance. Proper background ventilation helps maintain healthier indoor air quality, protects your property from moisture damage, and allows secure airflow without leaving windows open. You gain fresh air circulation while preserving your home's thermal efficiency and security.

So you understand what trickle vents do, but here's the question on many homeowners' minds: are they actually required by law? The answer isn't a simple yes or no. It depends on your specific situation, the type of work you're undertaking, and when your property was built. Let's break down exactly what the regulations say and how they apply to you.
The UK Building Regulations Approved Document Part F governs ventilation requirements for residential properties. Updated in June 2022, these regulations place significant emphasis on maintaining indoor air quality as homes become increasingly airtight. But when do they actually apply to your windows?
For new builds, the rules are straightforward. All new residential properties must include adequate background ventilation, which typically means fitting trickle vents or installing mechanical ventilation with heat recovery (MVHR). There's no getting around this requirement if you're constructing a new home.
Replacement windows present a more nuanced situation. According to Everest, when replacing windows, any existing trickle vents must be replaced with equivalent ventilation. If your current windows don't have vents, you must demonstrate that ventilation won't be made worse by the new installation. Since modern uPVC frames are typically more airtight than older windows, this often means trickle vents become necessary even when they weren't present before.
Can trickle vents be fitted to existing uPVC windows? Technically, yes. However, fitting trickle vents to existing uPVC windows isn't always straightforward. Many window suppliers are reluctant to retrofit vents to existing frames because the quality of installation cannot be guaranteed. The integrity of your window's thermal performance and weather sealing could be compromised if the work isn't done correctly.
When does retrofitting become necessary rather than optional? Consider these scenarios:
One notable exception exists: if you have or are installing an MVHR system, trickle vents should not be fitted. As Norrsken explains, this is to avoid creating unintended air pathways that would undermine the heat recovery system's efficiency.
Here's where many homeowners get confused. Trickle vents aren't measured by their physical dimensions. Instead, they're rated by something called Equivalent Area, abbreviated as EA and measured in square millimetres.
What exactly is Equivalent Area? Think of it this way: modern trickle vents include baffles, filters, and other design elements that limit airflow for good reasons, such as reducing drafts and blocking insects. Because of these features, the actual hole size doesn't accurately represent how much air can pass through. Equivalent Area accounts for these restrictions, measuring the true aerodynamic performance of the ventilator.
The Building Regulations Part F defines it precisely: "Equivalent area is a measure of the aerodynamic performance of a ventilator. It is the area of a sharp-edged circular orifice through which air would pass at the same volume flow rate, under an identical applied pressure difference, as through the opening under consideration."
Why does this matter for you? Because when purchasing vents, including popular options like Titon trickle vents for uPVC windows, you need to select products with the correct EA rating for each room. Too small, and you won't achieve adequate ventilation. Too large, and you might experience uncomfortable drafts or unnecessary heat loss.
The table below shows the minimum EA requirements based on room type and building configuration:
| Room Type | Multi-Storey Buildings (Minimum EA) | Single-Storey Buildings (Minimum EA) |
|---|---|---|
| Living Room | 8,000mm² | 10,000mm² |
| Bedroom | 8,000mm² | 10,000mm² |
| Kitchen | 8,000mm² | 10,000mm² |
| Bathroom | 4,000mm² | 4,000mm² |
| Utility Room | No minimum specified | No minimum specified |
| Toilet | No minimum specified | No minimum specified |
Notice how single-storey properties like bungalows require larger ventilation capacity in habitable rooms. This accounts for reduced natural stack effect ventilation compared to multi-storey buildings.
Beyond individual room requirements, there are also rules about the total number of ventilators throughout your home. The regulations specify that dwellings should have at least four ventilators in habitable rooms and kitchens for one-bedroom properties, or five ventilators for homes with more than one bedroom.
Wondering about trickle vents for uPVC windows cost implications? Sizing correctly from the start saves money. An undersized vent might seem cheaper initially, but you could face compliance issues or need additional ventilation measures later. Quality vents from reputable manufacturers like Titon typically range from £15 to £40 each, with acoustic versions costing more. Professional installation adds approximately £30 to £50 per vent, though many homeowners successfully complete DIY installations.
Can you fit trickle vents to uPVC windows yourself to reduce costs? Yes, with proper preparation and the right tools. However, understanding these sizing requirements first ensures you purchase the correct products before beginning any installation work.
Now that you understand the regulations and sizing requirements, you're probably wondering: which type of trickle vent for uPVC windows should you actually choose? Walk into any hardware store or browse online, and you'll discover a surprising variety of options. Each design serves different purposes, and selecting the wrong type could leave you with inadequate ventilation, unwanted noise, or an eyesore on your window frames.
Let's explore the main categories so you can match the right vent to your specific situation.
The most fundamental choice you'll face is between standard slot vents and acoustic trickle vents. Understanding what each offers helps you make the right decision for your home environment.
Standard slot vents are the most common type found in uPVC windows with trickle vents. These feature a simple design with a narrow opening across the top of your window frame. They're effective, affordable, and get the job done for most residential situations. You'll find them in virtually every new-build property that doesn't face specific noise challenges.
But what if you live near a busy road, railway line, or flight path? This is where acoustic trickle vents for uPVC windows become essential. According to the Double Glazing Advice Centre, these specialised vents incorporate sound-absorbing materials and internal acoustic baffles that deflect sound waves. The result? Studies indicate noise reduction of up to 41 dB, making them highly effective in noisy environments.
Consider this scenario: you've invested in high-quality double or triple glazing specifically to block traffic noise. Standard vents would effectively punch holes through that acoustic barrier, letting noise flood back in. Acoustic versions maintain your peace and quiet while still providing essential ventilation.
Beyond the standard versus acoustic distinction, you'll also encounter canopy vents. These feature an external hood that extends slightly from the frame, offering excellent protection against rain and drafts. While more visible than flush-mounted options, they're particularly useful in exposed locations or properties with persistent condensation issues.
Another crucial distinction involves how the vent integrates with your window frame. This choice often depends on whether you're fitting vents to new windows or retrofitting existing ones.
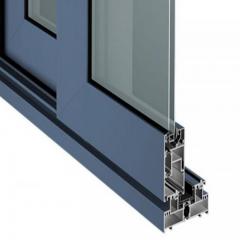
Through-frame (integrated) vents are built directly into the window frame during manufacturing. The ventilation channel runs through the frame itself, emerging on both the interior and exterior sides. According to GFD Homes, these are among the most popular choices for both residential and commercial buildings, offering a discreet look and compatibility with uPVC, timber, and aluminium frames.
Surface-mounted vents attach directly onto the existing window frame without requiring internal modification. They're the go-to option for retrofitting trickle vents on uPVC windows because installation doesn't require factory modification. You can add them to windows already in place.
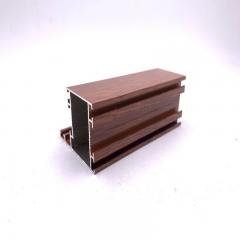
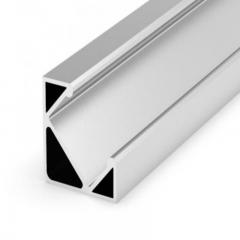
What materials should you look for? Modern trickle vents on uPVC windows are typically constructed from durable PVC or aluminium. Both materials offer excellent weather resistance and longevity, but each has distinct advantages.
PVC vents match uPVC window frames seamlessly and resist UV degradation. They're lightweight, affordable, and available in numerous colours. Aluminium vents provide superior strength and a more premium feel. They're particularly popular for contemporary properties where a sleek, modern finish matters.
Whichever material you choose, look for UV-stable, weather-resistant construction that won't yellow, crack, or warp over time. Quality manufacturers design their vents to withstand exposure to sun, rain, and temperature fluctuations for decades of reliable performance.
Your property type significantly influences which trickle vent style works best. Here's what to consider for different building configurations.
Flats and apartments often face unique challenges. Limited exterior access may restrict installation options, and building management approval might be required for any external modifications. Surface-mounted vents typically work well because they don't require frame modification. If you're on a busy street, acoustic versions become particularly valuable for blocking traffic noise while maintaining compliance.
Houses offer the most flexibility. You can choose any vent type based on your preferences and requirements. Consider through-frame vents for new windows where appearance matters, or surface-mounted options for retrofitting. Houses near main roads or railways benefit significantly from acoustic models.
Conservatories present special considerations. These spaces typically have more glazing relative to floor area, meaning ventilation needs can be higher. The lighter construction also means less thermal mass to moderate temperature swings. Multiple smaller vents distributed across several window frames often work better than a single large vent in conservatories.
Whatever your property type, remember that adjustable vents provide the most versatility. According to GFD Homes, manual adjustable vents allow you to control airflow depending on the weather or your preferences, making them a great choice for rooms where ventilation needs vary throughout the day or across seasons.
With so many options available, matching the right vent type to your specific needs ensures you'll achieve optimal ventilation without compromising on comfort, appearance, or noise control. Ready to move forward? The next step is understanding exactly how to fit these vents to your existing windows.
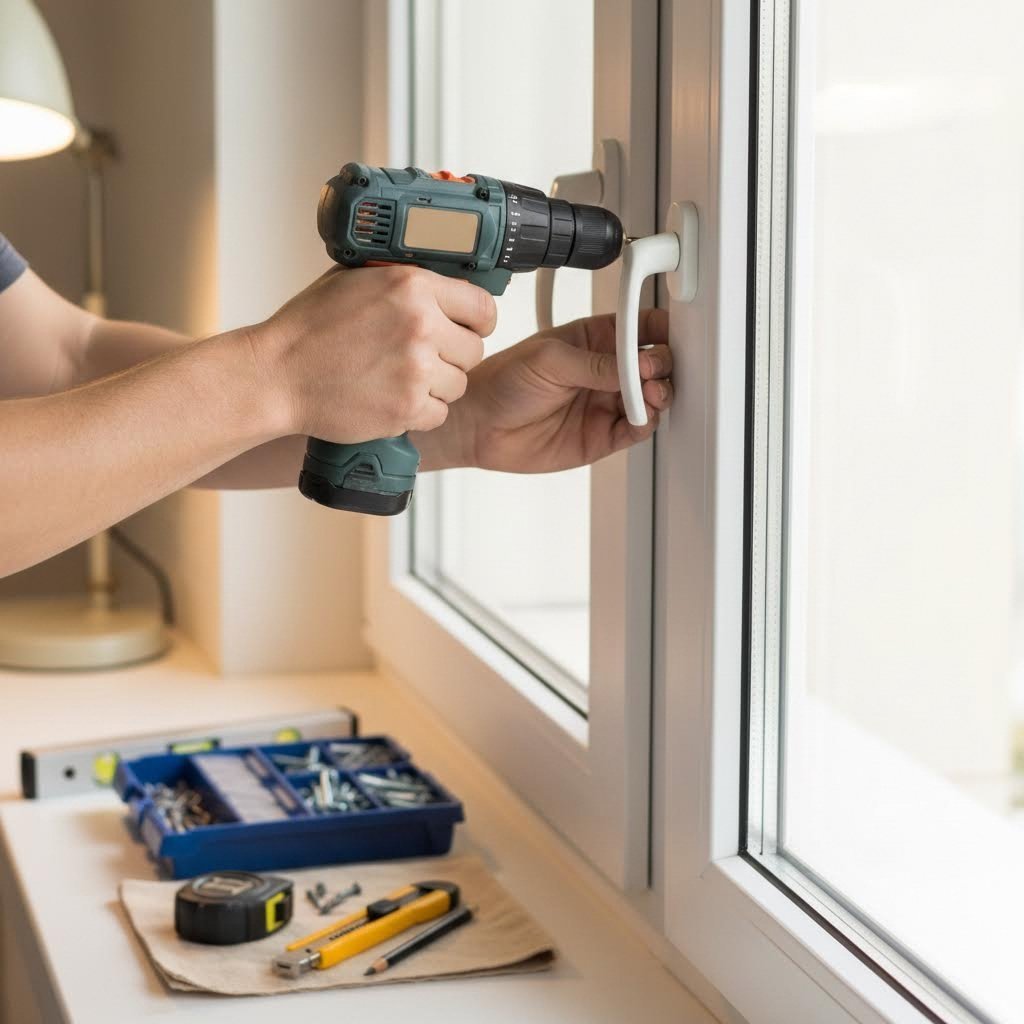
Good news if you've been wondering whether you can add trickle vents to uPVC windows that are already installed: yes, it's absolutely possible. Retrofitting trickle vents to uPVC windows is a practical solution that many homeowners successfully complete as a DIY project. You don't necessarily need to replace your entire window system to improve ventilation and tackle condensation problems.
That said, this isn't a task to rush into blindly. Unlike hanging a picture or changing a door handle, drilling into your window frame requires precision and proper preparation. Get it wrong, and you could damage your window, void warranties, or create new problems like drafts and water ingress. Get it right, and you'll enjoy fresher air and reduced moisture for years to come.
Ready to learn exactly how to fit trickle vents to existing uPVC windows? Let's walk through everything you need to know.
Before touching your windows, gather all the necessary tools and materials. Having everything within reach prevents frustrating interruptions mid-project and reduces the risk of mistakes from rushing.
Here's what you'll need:
According to Stewart Milne Homes, completing this installation project typically takes under an hour with proper preparation, making it manageable for most competent DIYers.
Before starting, assess your window frame carefully. The vent should be installed in the frame head, which is the horizontal section at the top of the window. Check for:
With your tools ready and frame assessed, here's how to install trickle vents in uPVC windows step by step:
Even experienced DIYers make errors when fitting trickle vents to uPVC windows. Here are the most common pitfalls and how to avoid them:
| Common Mistake | Why It's a Problem | How to Avoid It |
|---|---|---|
| Drilling too low on the frame | Reduces airflow efficiency and may interfere with window operation | Always install in the frame head (top horizontal section) |
| Skipping measurements | Results in misaligned vents that don't seal properly | Measure twice, drill once. Use the vent as a template |
| Drilling too fast | Causes uPVC to crack or melt, creating rough edges | Use medium drill speed and let the bit work gradually |
| Overtightening screws | Cracks the vent housing or window frame | Tighten until snug, then stop. Hand-finishing is safer |
| Ignoring steel reinforcement | Bent or broken drill bits, incomplete holes | Use HSS bits and proceed slowly when resistance increases |
| Not clearing debris | Prevents proper sealing, affects vent operation | Vacuum and wipe both sides before fitting vent components |
| Forgetting to test operation | Slider may stick or vent may rattle in wind | Test before fully tightening; adjust alignment if needed |
One particularly important point: when you retrofit trickle vents to uPVC windows, positioning is everything. The frame head provides optimal performance because warm, moist air naturally rises. Installing vents at this location maximises their ability to exhaust stale air while drawing fresh air in at a level that minimises drafts at head height.
While how to fit trickle vents for uPVC windows is straightforward for many homeowners, certain situations warrant professional assistance:
According to Stewart Milne Homes, DIY installation costs approximately £15-50 per vent for materials, while professional installation typically ranges from £80-150 per vent including labour and parts. For homeowners comfortable with basic power tools, the cost savings from DIY are substantial.
Always prioritise safety. Wear eye protection when drilling, as plastic fragments can fly unexpectedly. Work gloves protect against sharp edges on newly cut slots. If you're unsure about any aspect of how to fit a trickle vent to a uPVC window, there's no shame in consulting a professional. A properly installed vent will serve your home for decades, while a botched installation could cost far more to rectify.
Successfully completed your installation? Excellent. But what happens if something doesn't quite work as expected? The next section covers troubleshooting common problems that can occur during and after fitting trickle vents.
You've the installation steps carefully, drilled the holes, and fitted the vent. But something isn't quite right. Perhaps you're experiencing unexpected drafts, or the slider mechanism feels stiff and unresponsive. Maybe you've noticed air whistling through on windy days, or the vent simply won't close properly no matter what you try.
Don't worry. These issues are more common than you might think, and most have straightforward solutions. Understanding how to fit trickle vents on uPVC windows is only half the battle. Knowing how to troubleshoot problems separates a frustrating experience from a successful home improvement project.
Let's start with issues that typically emerge during or immediately after installation. Catching these early prevents bigger headaches later.
Hitting steel reinforcement bars is perhaps the most common obstacle when learning how to fit a trickle vent to a uPVC window. According to VENTI Group, improper alignment during installation can lead to air leakage, reduced ventilation efficiency, and increased condensation risks. If your drill suddenly meets serious resistance partway through the frame, you've likely encountered internal steel reinforcement.
Here's how to handle it:
Incorrect sizing creates problems that aren't immediately obvious but become apparent over time. If you've purchased a vent with insufficient Equivalent Area for your room, you won't achieve adequate ventilation regardless of how perfectly you install it. Conversely, an oversized vent may create uncomfortable drafts or excessive heat loss.
The solution? Refer back to the EA requirements table from the regulations section. If your installed vent is undersized, you may need to add a second vent to the same room or replace it with a larger unit. Oversized vents can often be partially closed using the slider control, though this isn't ideal as a permanent solution.
Misaligned drilling occurs when the internal and external vent components don't line up properly. This restricts airflow and may prevent the vent from sealing correctly. Prevention is better than cure here: always use the vent itself as a template when marking drill positions, and double-check alignment before securing components permanently.
Some problems only become apparent days or weeks after installation, often when weather conditions change. Here's how to diagnose and address them.
Distinguishing drafts from proper ventilation confuses many homeowners. Trickle vents are designed to provide background ventilation, not create noticeable air movement. If you can feel a strong draft near your vent, something's wrong.
Proper ventilation feels like this: you're barely aware of any air movement, yet the room feels fresh rather than stuffy. Indoor humidity stays controlled, and condensation reduces over time.
Problematic drafts feel like this: you notice cold air on your skin near the window, especially during windy conditions. The vent may whistle or rattle. You might even see curtains moving near the window.
What causes the difference? According to Double Glazing Blogger, many homeowner complaints about vents relate specifically to noise and wind issues. Poorly sealed vents allow uncontrolled air entry rather than the gentle, managed flow they're designed to provide.
Air leaks around poorly sealed vents are a primary cause of drafts. If the vent components don't sit flush against the frame, or if the drilled slot extends beyond the vent's sealing area, air bypasses the controlled ventilation path entirely.
To fix this:
Vents that stick or won't close properly often result from debris in the mechanism, overtightened screws distorting the housing, or misalignment between components. Start by loosening the fixing screws slightly and testing the slider. If this improves operation, the housing was compressed during installation.
Noise issues take two forms: whistling during wind and external noise penetration. Whistling typically indicates air turbulence from rough slot edges or gaps in the seal. How to fit trickle vents to uPVC windows properly means creating smooth, clean openings that allow laminar airflow. If you're experiencing whistling, remove the vent, smooth all edges with fine sandpaper, and ensure the slot width matches the vent channel exactly.
For external noise penetration, the solution depends on your vent type. Standard vents offer minimal acoustic protection. If traffic or environmental noise is problematic, consider replacing trickle vents in uPVC windows with acoustic models designed specifically for noise reduction.
The following table summarises common problems and their solutions for fast reference:
| Problem | Likely Cause | Solution |
|---|---|---|
| Drill won't penetrate frame | Steel reinforcement bar inside frame | Switch to HSS or cobalt bit; reduce speed; use cutting lubricant |
| Noticeable cold draft near vent | Poor seal between vent and frame | Apply foam tape or compression seal; check screw tightness; seal with silicone |
| Whistling noise in wind | Rough slot edges or air gaps | Remove vent; smooth all edges; ensure slot matches vent channel width |
| Slider mechanism sticks | Overtightened screws or debris | Loosen fixing screws slightly; clean slider track; apply silicone lubricant |
| Vent won't close completely | Misalignment or warped housing | Loosen screws; realign components; replace if housing is damaged |
| External noise penetration | Standard vent lacks acoustic properties | Replace with acoustic trickle vent rated for noise reduction |
| Condensation hasn't improved | Vent undersized or kept closed | Check EA rating matches room requirements; keep vent open continuously |
| Water ingress during rain | External canopy not sealed properly | Refit canopy with weather seal; apply silicone around edges |
| Vent rattles in wind | Loose components or worn parts | Tighten all fixings; replace worn end caps or slider mechanism |
Sometimes, troubleshooting reveals that your vent needs replacing rather than repairing. How to remove trickle vents in uPVC windows is straightforward: unscrew both internal and external components, then carefully extract them from the frame. The existing slot remains usable for a replacement vent of the same dimensions.
Consider replacement when:
When replacing, fit trickle vents to uPVC windows using the same slot dimensions where possible. If upgrading to a larger vent, you'll need to extend the slot carefully, following the original drilling process.
With these troubleshooting strategies in hand, you're equipped to resolve most common issues. But prevention is always better than cure. Understanding how to maximise your trickle vent's performance through proper use and maintenance keeps problems from developing in the first place.
Your trickle vents are installed and working properly. But here's what many homeowners don't realise: how you use and maintain these vents throughout the year dramatically affects their effectiveness. A uPVC window trickle vent that's neglected or improperly adjusted won't deliver the condensation-fighting, air-freshening benefits you installed it for in the first place.
Think of your vents like any other home system. Your boiler needs annual servicing. Your gutters require periodic cleaning. Your trickle vents deserve the same attention, yet they're often forgotten until problems emerge. Let's change that by exploring exactly how to optimise performance across seasons and keep everything running smoothly for years to come.
Should you adjust your upvc windows trickle vents differently in January compared to July? Absolutely. While the general advice is to keep vents open continuously, the degree of opening can vary based on seasonal conditions and your home's specific needs.
Winter settings require a balanced approach. Cold weather creates the highest risk of condensation because the temperature difference between warm indoor air and cold window surfaces is greatest. This is precisely when background ventilation matters most. According to Shengxin Aluminium, properly installed trickle vents are designed to provide gentle, controlled airflow that doesn't create noticeable drafts even in cold conditions.
During winter months:
Summer settings offer more flexibility. Warmer external temperatures mean less condensation risk, but indoor air quality still benefits from continuous fresh air exchange. Many homeowners open vents fully during summer months, particularly at night when cooler outdoor air provides natural cooling.
During warmer months:
Transition seasons like spring and autumn present variable conditions. Morning condensation remains common as temperatures fluctuate. Maintain consistent vent openings during these periods rather than constantly adjusting, which can lead to forgetting and leaving vents closed when you need them most.
Here's something important: your upvc window trickle vent works best as part of a coordinated ventilation approach, not in isolation. Understanding how different ventilation methods complement each other helps you achieve optimal indoor air quality throughout your home.
Trickle vents provide background ventilation - that constant, gentle air exchange happening 24 hours a day. They're designed to handle everyday moisture from breathing, plants, and normal household activities.
Extractor fans handle peak moisture loads - the sudden humidity spike from a hot shower or boiling pasta. According to NY Engineers, the combination of exhaust fans and trickle vents works effectively when both systems are properly coordinated. Your extractor fans create negative pressure that actually enhances airflow through trickle vents, pulling fresh air in as stale air is expelled.
Opening windows provides rapid purge ventilation - quickly clearing stale air after cooking strong-smelling food or when the house feels particularly stuffy. This isn't a replacement for background ventilation but a supplement for specific situations.
For optimal results:
Dust, pollen, cobwebs, and general debris gradually accumulate in trickle vent openings. Left unchecked, this buildup restricts airflow and reduces ventilation efficiency. According to Stewart Milne Homes, cleaning trickle vents upvc windows regularly is essential for maintaining optimal performance.
The good news? Maintenance is straightforward and takes just minutes per vent. Here's your comprehensive maintenance checklist:
Understanding the direct connection between vent usage and moisture control helps reinforce good habits. When you leave vents open consistently, you're creating a constant air exchange that carries moisture-laden indoor air outside before it can condense on cold surfaces.
Mould spores exist everywhere, but they only grow when conditions are right: sufficient moisture, suitable temperature, and organic material to feed on. Your window frames, silicone seals, and surrounding plaster provide the organic material. Room temperature provides the warmth. The only factor you can effectively control? Moisture levels.
Proper trickle vent use breaks the mould growth cycle by:
The relationship is simple: consistent ventilation equals controlled humidity equals no condensation equals no mould. Each element depends on the others. Close your vents for an extended period, and you'll likely notice condensation returning within days, especially during colder months.
Investing a few minutes each quarter in cleaning and a moment each day in checking your vents remain open pays dividends in comfort, health, and property protection. But what about the financial side of this investment? Understanding the true costs and long-term value of quality trickle vents helps you make informed purchasing decisions.
You've learned how trickle vents work, what regulations require, and how to install them properly. But one crucial question remains: how much should you actually budget for this project? Whether you're planning to buy trickle vents for uPVC windows online or through a local supplier, understanding the true costs helps you avoid surprises and make smarter purchasing decisions.
The reality is that pricing varies significantly depending on vent type, quality, and whether you tackle installation yourself or hire a professional. Let's break down exactly what you can expect to spend and why investing in quality pays off over the long term.
When shopping for replacement trickle vents for uPVC windows, you'll notice prices ranging from budget-friendly to premium. What drives these differences, and does spending more actually get you a better product?
Here's what the market looks like across different vent categories:
| Vent Type | Typical Price Per Unit | Key Factors Affecting Cost |
|---|---|---|
| Basic standard slot vents | £10 - £20 | Simple design, limited features, basic materials |
| Mid-range adjustable vents | £20 - £35 | Better build quality, smoother slider mechanisms, improved seals |
| Premium standard vents | £35 - £50 | Superior materials, precise manufacturing, longer warranties |
| Acoustic trickle vents | £45 - £80 | Sound-absorbing baffles, specialised construction, noise reduction ratings |
| Canopy-style weather vents | £25 - £45 | Extended external hood, enhanced rain protection, robust construction |
According to Double Glazing Direct, homeowners should plan to spend around £30 to £80 for each new trickle vent including installation costs. That figure accounts for both the product and professional fitting, giving you a realistic all-in budget.
What factors push prices higher or lower? Several elements come into play:
The installation approach you choose dramatically affects your total project cost. Here's how the numbers compare:
DIY installation costs:
Professional installation costs:
According to Sussex Damp Experts, the gap between DIY and professional costs often narrows when you factor in the value of documentation, compliance peace of mind, and reduced risk of installation errors. For rental properties or homes being prepared for sale, professional installation with proper certification can prove invaluable during surveys or inspections.
Fitting trickle vents in uPVC windows yourself makes sense when you're comfortable with power tools, have just a few windows to address, and don't require formal certification. Professional installation becomes the smarter choice for larger projects, properties with compliance requirements, or situations where you'd rather guarantee the job is done correctly first time.
Looking beyond upfront costs reveals why quality trickle vents deliver excellent value over time. Consider these ongoing benefits:
Energy savings from reduced window opening: Opening windows for ventilation during winter wastes significant heating energy. Your boiler works harder to replace the warm air escaping through open windows, increasing energy bills. Background ventilation through trickle vents maintains air quality without this heat loss penalty. While individual savings vary, homes that rely on trickle vents rather than opening windows for routine ventilation typically see measurable reductions in heating costs.
Prevention of moisture damage: Condensation isn't just unsightly - it damages property. Persistent dampness deteriorates window seals, rots wooden components, stains walls, and creates conditions for mould growth. Remediation costs for serious damp and mould problems often run into hundreds or thousands of pounds. A set of properly functioning trickle vents costing perhaps £150 - £300 to install prevents damage that could cost ten times more to rectify.
Health protection: Mould spores aggravate respiratory conditions, trigger allergies, and pose particular risks to children, elderly residents, and anyone with compromised immunity. The health costs of poor indoor air quality, while difficult to quantify precisely, represent real impacts that proper ventilation prevents.
Property value protection: Buyers and surveyors notice condensation, mould, and inadequate ventilation. These issues can affect property valuations and complicate sales. Investing in proper ventilation protects your home's marketability and value.
With so many options available from retailers like trickle vents for uPVC windows Wickes or uPVC window trickle vents Screwfix stock, how do you identify products that will perform reliably for years? Not all vents are created equal, and the cheapest option often proves most expensive in the long run.
When evaluating trickle vents, prioritise these essential features:
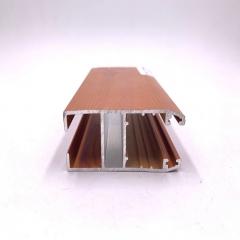
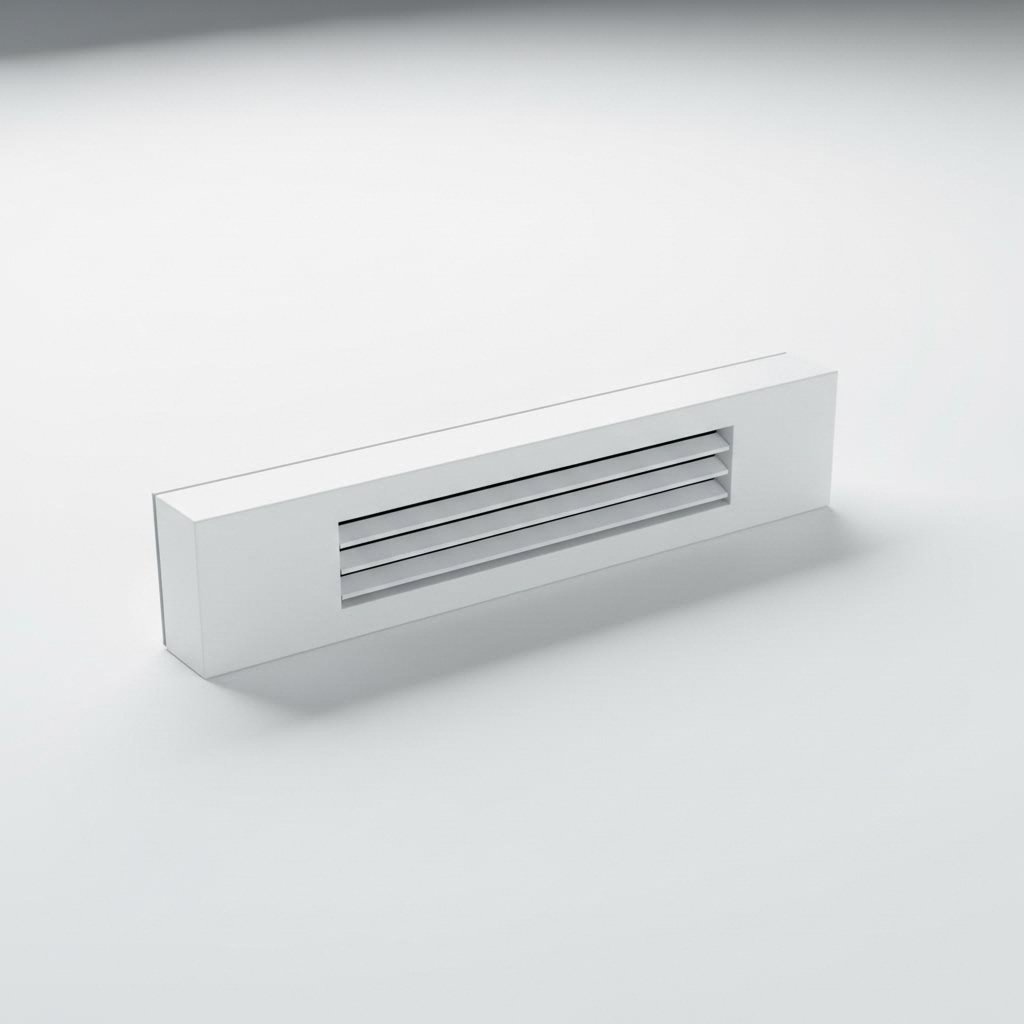
For homeowners seeking quality retrofit options that balance performance with value, Shengxin Aluminium's Slim uPVC Window Trickle Vents exemplify what to look for in a well-engineered solution. These units feature the manual slider control essential for regulating airflow to your preferences, while their low-profile design integrates seamlessly into existing uPVC window systems without compromising the thermal efficiency you rely on.
What distinguishes premium vents from budget alternatives? According to Shengxin Aluminium's homeowner guide, certified products from reputable manufacturers resist weathering, UV damage, and corrosion, making them especially suitable for long-term performance. The combination of durable construction, precise manufacturing tolerances, and quality materials means these vents continue operating smoothly for years rather than developing the sticking, rattling, or seal failures common in cheaper products.
The mathematics of quality becomes clear over a typical ownership period. A budget vent at £15 that fails or underperforms within two years costs more than a £35 quality vent that lasts a decade or longer. Factor in the hassle of replacement, potential damage from failed seals, and the frustration of dealing with poor performance, and the value equation favours investing in quality from the start.
Whether you source products locally or explore options from specialist manufacturers, applying these selection criteria ensures you purchase vents that deliver on their promise of improved indoor air quality, reduced condensation, and long-term reliable performance. With the right products installed correctly, you're ready to enjoy the benefits of proper ventilation for years to come.
You've now covered everything from understanding what trickle vents do to troubleshooting problems and selecting quality products. But knowing the information and taking action are two different things. How do you actually move forward? Whether you're dealing with persistent condensation, preparing for a building inspection, or simply wanting fresher indoor air, the path from here depends on your specific circumstances.
Let's bring together everything you've learned into a practical decision framework. By working through these considerations systematically, you'll know exactly what your home needs and how to achieve it.
Before purchasing products or calling installers, work through this checklist to clarify your requirements:
With your requirements clarified, action becomes straightforward. The importance of proper ventilation for indoor air quality cannot be overstated. According to Shengxin Aluminium, modern airtight homes particularly need background ventilation to prevent moisture buildup, protect against mould growth, and maintain healthy living conditions.
For those ready to proceed with retrofit trickle vents uPVC windows projects, selecting the right product matters as much as proper installation. Look for vents featuring manual slider controls for airflow adjustment, low-profile designs that integrate without visual disruption, and durable construction that withstands years of use without degradation.
Shengxin Aluminium's Slim uPVC Window Trickle Vents deliver exactly these qualities. Engineered for quiet, controlled passive ventilation, these units feature manual sliders for precise airflow regulation and seamless integration into existing uPVC window systems. Their durable, low-profile construction ensures years of reliable performance without compromising your windows' thermal efficiency.
Whatever path you choose, remember that proper ventilation represents an investment in your home's health, your family's comfort, and your property's long-term value. The small effort of adding trickle vents pays dividends every day in fresher air, reduced condensation, and protection against the damaging effects of excess moisture. Your windows are ready. Your home is waiting. Take that next step toward better ventilation today.
Yes, trickle vents can be retrofitted to existing uPVC windows. The process involves measuring and marking the frame head, drilling a series of holes to create a ventilation slot, and securing both internal and external vent components. While many homeowners complete this as a DIY project using basic power tools, some window suppliers are reluctant to retrofit vents because installation quality cannot be guaranteed. Professional installation costs approximately £30-50 per vent in addition to product costs, but ensures proper fitting and may preserve warranty coverage.
Under UK Building Regulations Approved Document Part F (updated June 2022), trickle vents are required in all new residential properties and most replacement windows. When replacing existing windows, any current trickle vents must be replaced with equivalent ventilation. If your original windows lacked vents, you must demonstrate that ventilation won't worsen with the new installation. The exception is homes with mechanical ventilation with heat recovery (MVHR) systems, where trickle vents should not be fitted to avoid undermining system efficiency.
Equivalent Area (EA) measures the aerodynamic performance of a trickle vent in square millimetres, accounting for baffles and filters that restrict airflow. Building Regulations specify minimum EA ratings by room type: living rooms, bedrooms, and kitchens in multi-storey buildings require 8,000mm² minimum, while single-storey properties need 10,000mm². Bathrooms require 4,000mm² regardless of building type. Selecting vents with the correct EA rating ensures adequate ventilation without excessive drafts or heat loss.
Quarterly maintenance includes vacuuming internal and external vent openings, wiping grilles with a damp cloth, checking for debris in external canopies, and testing slider mechanisms. Every six months, inspect mounting screws, seals, and gaskets for damage. Annually, remove internal covers for thorough cleaning with warm soapy water, allow components to dry completely, and apply silicone lubricant to stiff sliders. Regular maintenance prevents airflow restriction and extends vent lifespan significantly.
Standard slot vents provide basic background ventilation and are suitable for most residential situations. Acoustic trickle vents incorporate sound-absorbing materials and internal baffles that can reduce noise by up to 41 dB, making them essential for properties near busy roads, railways, or flight paths. While standard vents cost £15-25 each, acoustic versions range from £45-80 but preserve the investment in acoustic glazing by preventing noise from bypassing your windows through ventilation openings.


 un service en ligne
 0086 136 3563 2360
 sales@sxalu.com
 +86 136 3563 2360
 français
 English
 Deutsch
 русский
 español
 português
 العربية
 ไทย
ไทย Việt
Việt Українська