You probably already know those slim slots sitting at the top of your window frames. They let a gentle stream of fresh air into your home even when the window stays shut. But here is a question most homeowners never think to ask: what is a trickle vent cover, and is it the same thing as the vent itself? The answer matters more than you might expect — especially if a cracked, yellowed, or missing piece is the only thing standing between you and a quick fix.
A trickle vent cover is the removable internal or external fascia that clips onto a trickle ventilator's housing. It controls the slot opening through a sliding mechanism and shields the vent channel from dust, debris, and insects — without being the vent unit itself.
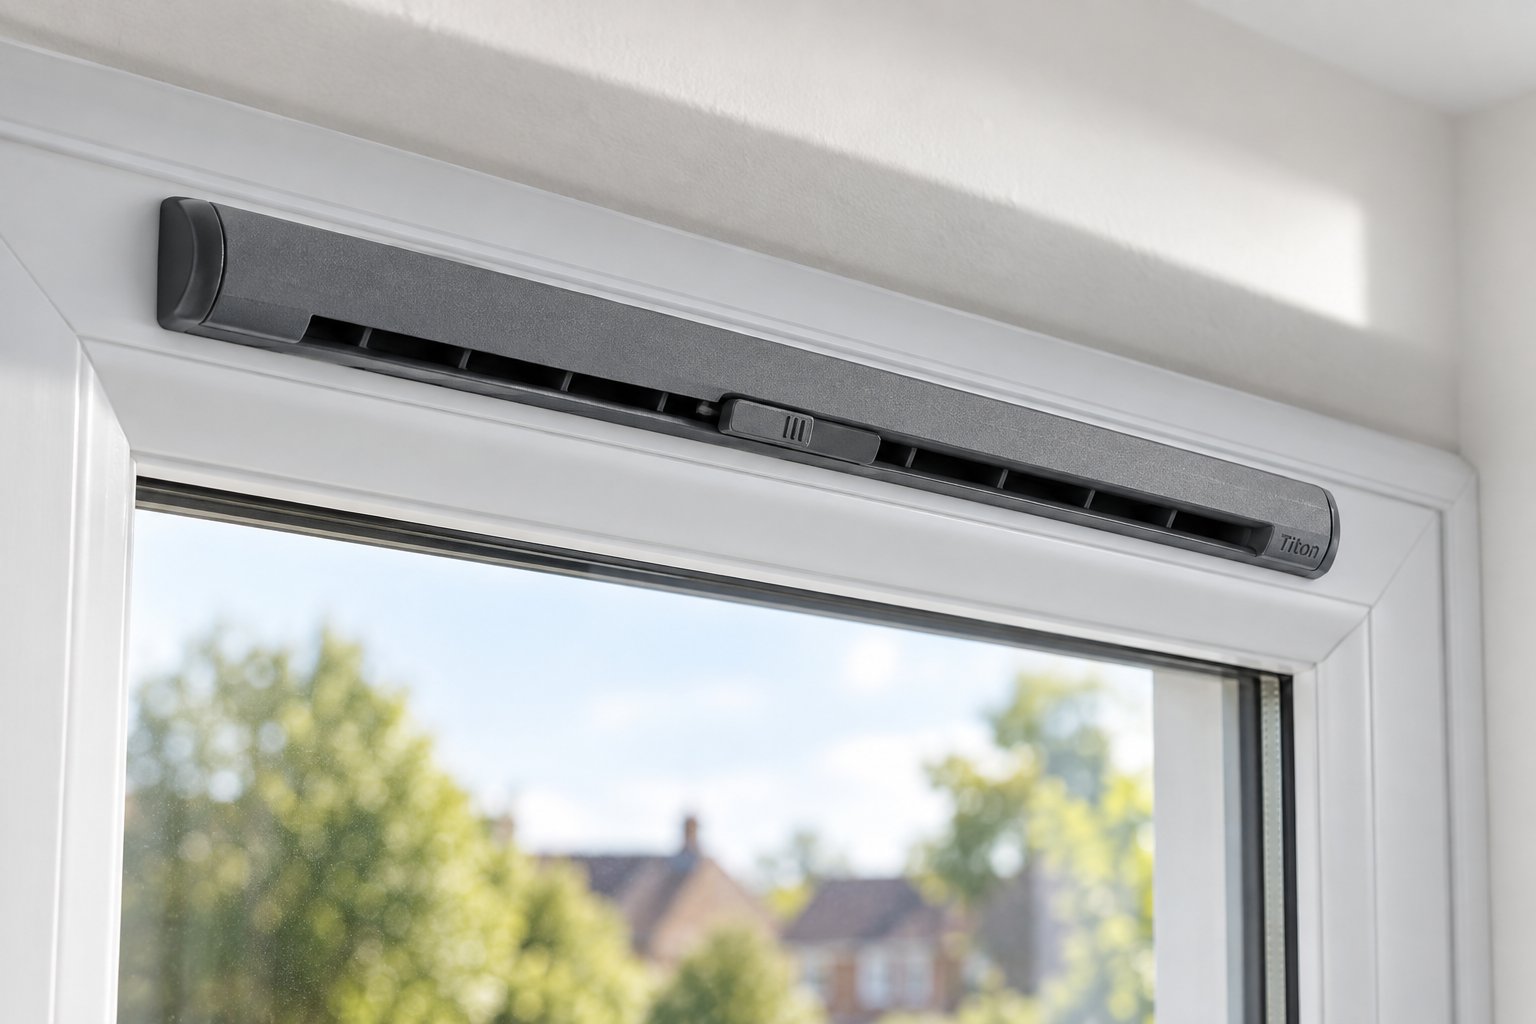
Picture a trickle vent as a three-part system. On the outside of your window frame sits the external canopy, which deflects rain away from the opening. Through the frame runs a narrow channel — the slot that air actually travels through. And on the inside, you will find the cover: a slim, typically plastic or metal strip that clips directly onto the housing.
A trickle vent cover on a window frame serves two practical purposes. First, it protects the slot from accumulating household dust, cooking residue, and small insects that would otherwise clog the channel. Second, it gives you direct control over airflow. Most covers feature a hit-and-miss slider — a small tab you push left or right to open, partially close, or fully close the vent slots. This simple mechanism lets you regulate background ventilation room by room without ever cracking a window open.
You will find these covers on uPVC, aluminium, and timber frames alike. They are designed to be user-removable, which means you can unclip one for cleaning or swap it for a replacement without calling a tradesperson or disturbing the rest of the vent assembly.
This is where confusion trips up most people. When homeowners search for a trickle vent cover vs full vent unit, they often assume the cover is the vent. It is not. The full trickle vent unit includes the external canopy, the internal housing routed into (or mounted onto) the frame, and the cover. Each component has a distinct job. The housing and canopy manage weatherproofing and structural airflow. The cover handles day-to-day control and protection.
Why does this distinction save you money? Imagine your internal cover snaps at its clip, or years of sunlight turn it from crisp white to dull yellow. The housing behind it and the canopy outside are still perfectly functional. Replacing the entire vent assembly in that scenario is like buying a new car because the mirror cracked. You only need the cover.
Understanding how a trickle vent cover works — clip on, slide to adjust, clip off to clean — puts you in a stronger position the moment something goes wrong. Instead of replacing hardware you do not need, you target the one part that actually failed. That targeted approach is exactly what this guide is built around.
Of course, knowing you need just the cover is only the first step. The real challenge begins when you try to figure out why your current one failed and whether a simple replacement will solve the problem for good.
A trickle vent cover rarely fails dramatically. There is no loud snap in the middle of the night, no sudden gust of cold air signalling disaster. Instead, it tends to deteriorate gradually — a slight wobble one month, a yellowish tinge the next — until one day you glance up at your window frame and realise something clearly is not right. Recognising exactly why your cover needs attention helps you avoid the most common (and most expensive) mistake: replacing hardware that still works perfectly fine behind a damaged fascia.
So why replace a trickle vent cover in the first place? In most cases, one of the following real-world triggers is responsible.
Broken or snapped clips. This is the single most frequent issue. The small plastic clips that secure the cover to its housing are under constant low-level stress every time you slide the vent open or closed. Over years of use — or one slightly heavy-handed cleaning session — a clip can snap. When that happens, the cover sits loosely, rattles in the wind, or falls off entirely. A trickle vent cover with broken clips cannot seal the slot properly, and you will often hear a faint whistling sound when it is windy outside.
UV-induced yellowing. If you have white uPVC covers on south-facing or west-facing windows, you have probably noticed them turning a dull cream or yellow over time. Ultraviolet radiation breaks down the polymer surface, and no amount of scrubbing will reverse the discolouration. A yellowing trickle vent cover replacement is one of the easiest cosmetic upgrades you can make — it freshens up the whole window line in minutes.
Cosmetic damage from maintenance work. Window cleaners sometimes bump the covers with squeegee handles. Painters occasionally coat them in emulsion or gloss without masking them off first. Even careful DIY work around window frames can leave scratches, chips, or paint splatter on the cover surface. None of these issues affect airflow, but they are visually distracting once you spot them.
Covers lost during renovation. Builders and window fitters routinely remove trickle vent covers to access frame fixings or apply sealant. They do not always put them back. If you have recently had windows serviced, plastering done near window reveals, or curtain tracks installed, a missing cover is a surprisingly common oversight.
Desire for a visual upgrade. Some homeowners simply want a cleaner look. Swapping a dated white plastic cover for a sleek anthracite grey or brushed aluminium finish can make a noticeable difference — without the cost of replacing the entire vent assembly.
Here is where many people waste money. They see a damaged or discoloured cover and assume the whole trickle vent is faulty. In reality, the housing and external canopy behind that cover are often in perfect working order. Before you order anything, run through this simple diagnostic:
Do I need a new trickle vent or just the cover? For the majority of homeowners asking this question, the answer is just the cover. The housing and canopy are engineered to last the lifetime of the window frame itself. The cover, being the most handled and most exposed component, wears out first — and that is exactly how the system is designed.
Knowing that a replacement cover is all you need brings up the next practical question: what size do you actually need, and how do you measure for it accurately?
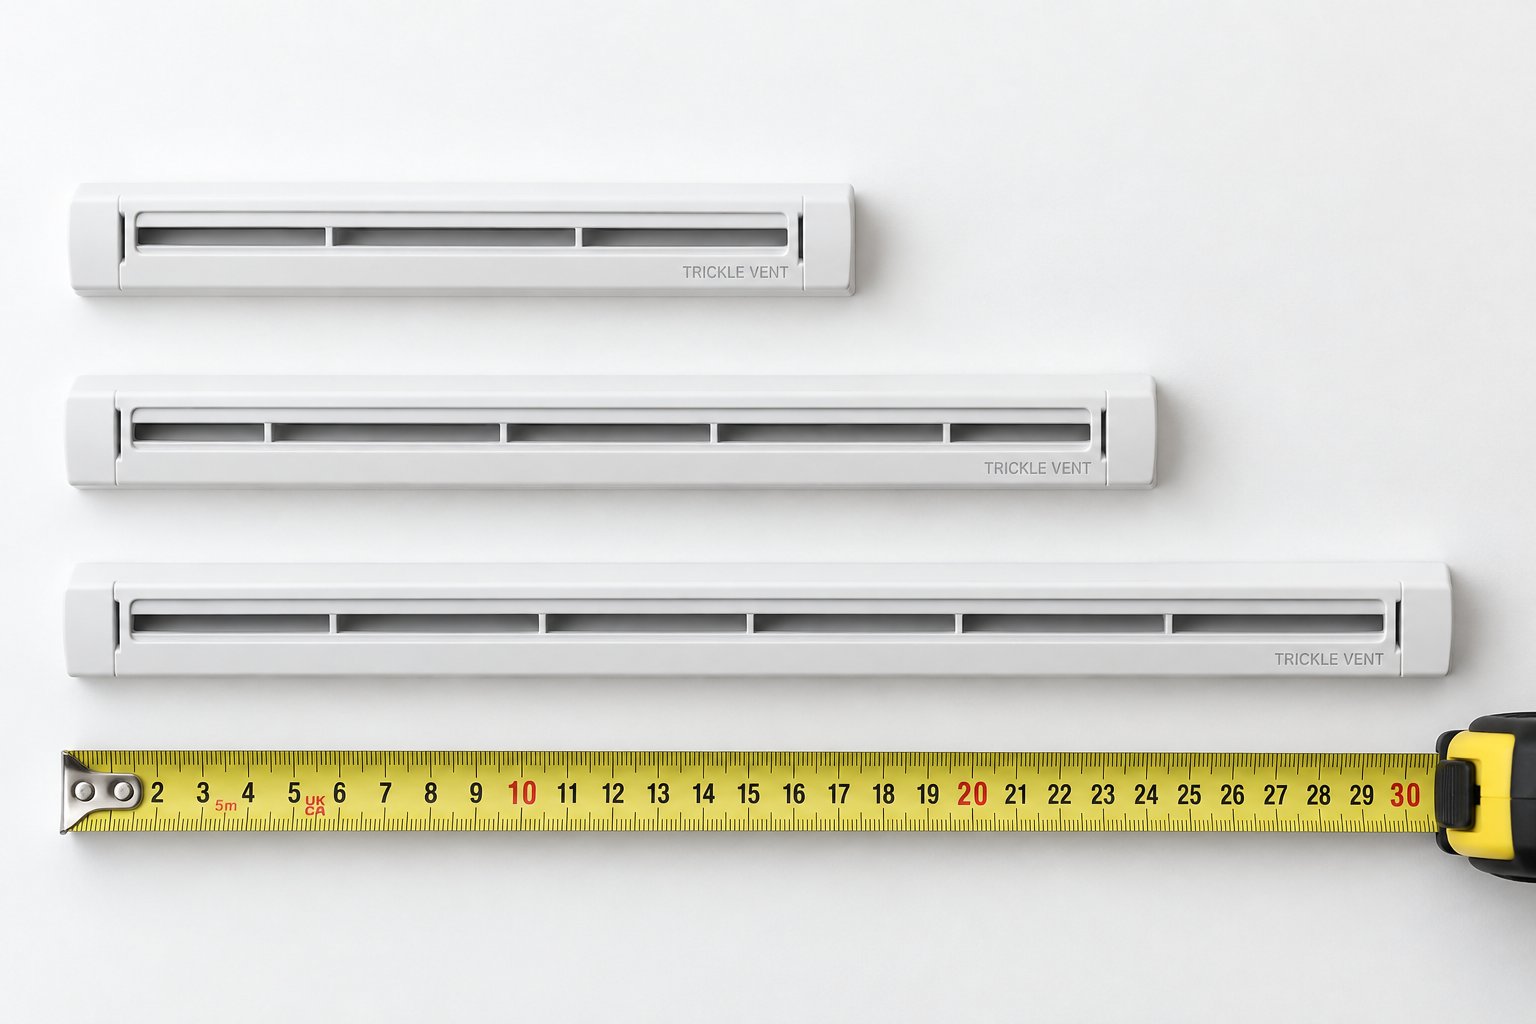
Here is a frustrating reality that catches many homeowners off guard: trickle vent covers are not universal. You cannot simply walk into a hardware store, pick up any cover labelled "standard," and expect it to clip neatly onto your window frame. These components are typically brand-specific or, at the very least, system-specific. The wrong size will refuse to seat into the housing properly — clips will not line up, the cover will rock or rattle, and the slider may not align with the slot openings beneath it. Getting the right fit starts with understanding the size landscape and taking accurate measurements before you order anything.
Trickle vent cover sizes cluster around a handful of common length categories rather than following a single industry-wide standard. The most frequently encountered domestic covers fall within a range of approximately 260 mm to 412 mm in total length. Within that range, you will see three broad groupings that correspond to different window widths and ventilation requirements.
| Size Category | Typical Length Range | Common Window Types | Typical Equivalent Area (EA) |
|---|---|---|---|
| Small | 260 mm – 300 mm | Narrow casements, fanlights, bathroom windows up to roughly 600 mm wide | 2,500 – 3,000 mm² |
| Standard | 300 mm – 400 mm | Typical single and double casement windows, most bedroom and living room frames | 4,000 – 5,000 mm² |
| Large | 400 mm – 412 mm | Wider casements, patio door frames, and frames requiring higher background airflow | 5,000 – 6,000 mm² |
A few important notes on this table. The most common trickle vent sizes in the UK are 300 mm, 400 mm, and 420 mm, with a 300 mm vent generally suiting windows up to 600 mm wide and a 400 mm vent fitting wider frames. Commercial and non-domestic buildings sometimes use covers that extend well beyond 412 mm to serve larger frame profiles, but those fall outside the scope of a typical home replacement.
Length alone does not tell the whole story. Cover width — the dimension from front edge to back edge — varies between manufacturers, typically ranging from around 12 mm to 18 mm for internal covers. More critically, the clip spacing differs. Two covers might share identical total lengths yet have their retention clips positioned at completely different intervals along the underside. If the clip spacing does not match the slots moulded into your housing, the cover simply will not lock in. This is exactly why grabbing a "close enough" replacement from a different brand so often ends in frustration.
Whether your current cover is still attached or already missing, you can get the measurements you need in under five minutes. Grab a tape measure — ideally a metal one for precision — and follow these steps.
If the cover is still in place:
If the cover is missing:
One practical tip: take a photo of the housing with your phone and place a coin beside it for scale reference. If you need to contact a supplier or search online for a match, that image is worth more than a paragraph of description.
Imagine you have nailed the measurements and confirmed you need a cover that is 400 mm long with 16 mm width and three clips spaced at specific intervals. The next variable that shapes your choice — and one that directly affects how long your replacement will last — is what the cover is actually made from.
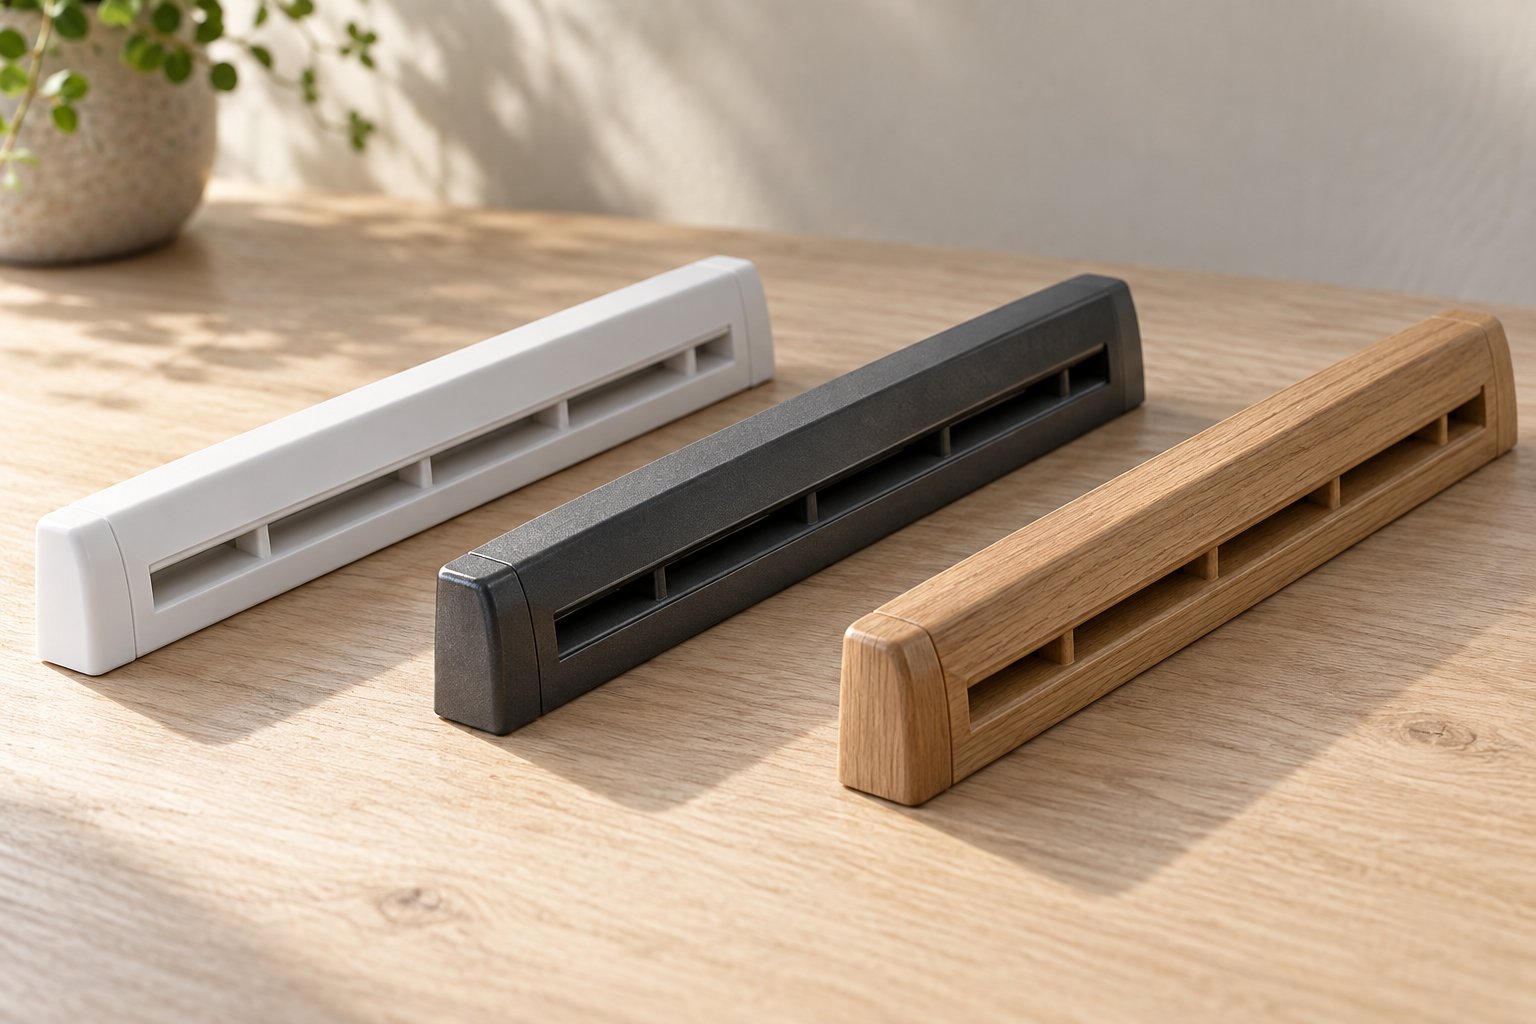
You have the right measurements in hand and a clear picture of the size you need. But two covers with identical dimensions can deliver wildly different lifespans, appearances, and compatibility results depending on one critical variable: what they are made from. The frame material on your window largely dictates which type of cover will work — and understanding the trade-offs between the three main options helps you avoid a replacement that looks great on day one and disappoints within a couple of years.
A trickle vent cover material comparison comes down to three contenders: uPVC (the most common in UK homes), aluminium (increasingly popular on modern builds), and timber (the traditional choice for period properties). Each brings a distinct set of strengths and compromises across durability, UV resistance, aesthetic finish, and cost.
| Factor | Aluminium | uPVC | Timber |
|---|---|---|---|
| Durability | Excellent — resists impact, warping, and degradation for 30+ years | Good — lightweight and functional but clips can become brittle over time | Moderate — solid when maintained, but vulnerable to moisture and splitting |
| UV Resistance | High — powder-coated or anodised finishes resist fading and discolouration | Low to moderate — white covers are prone to yellowing on sun-exposed elevations | Variable — depends entirely on paint quality and recoating frequency |
| Aesthetic Finish | Sleek, slim profiles; wide range of RAL colour and metallic finishes | Clean but utilitarian; limited to standard colours (white, brown, caramel, grey) | Traditional and warm; can be custom-painted to any colour |
| Typical Cost Bracket | Mid to premium | Budget to mid-range | Mid to premium (plus ongoing maintenance costs) |
| Best Compatibility | Aluminium and flush-profile window systems; also retrofits onto uPVC frames with matching housings | uPVC window frames — the default pairing across most UK domestic properties | Timber window frames, especially heritage and conservation-area properties |
Let's break each option down so you can match the right material to your frame type, aesthetic preferences, and budget.
If you live in a typical UK home built or refurbished within the last 30 years, there is a strong chance your existing covers are uPVC. These plastic fascias dominate the domestic market for good reason: they are inexpensive, lightweight, and available in sizes that match virtually every major uPVC window system on the market.
For a straightforward uPVC trickle vent cover replacement, the process is as painless as it gets. Covers are widely stocked by hardware retailers and online window-parts suppliers, often costing just a few pounds each. The clips are moulded directly into the plastic body, and fitting takes seconds once you have the correct size.
The trade-off? Longevity under sunlight. UV radiation progressively breaks down the polymer surface of white uPVC, causing irreversible yellowing that no cleaning product can reverse. South- and west-facing windows suffer the worst of it. Over a 10- to 15-year cycle, you will likely notice the covers turning from bright white to a dull cream — while the window frame itself, treated with more robust UV stabilisers during manufacture, often retains its colour far longer. The contrast draws attention to the ageing cover and makes the whole window look tired.
Clip brittleness is the other weak point. Plastic clips lose flexibility as they age, especially in frames exposed to temperature swings. A clip that snapped cleanly on a cold January morning is a familiar story for anyone who has dealt with older uPVC vent hardware. That said, if cost-effectiveness is the priority and you are comfortable swapping covers every decade or so, uPVC remains a perfectly sensible choice for plastic-framed windows.
Aluminium trickle vent cover options occupy a different tier entirely. Where plastic is lightweight and disposable, aluminium is engineered for the long haul. According to ventilation industry specialists, well-manufactured aluminium vent components routinely exceed 30 years of service life — outlasting their uPVC equivalents by a significant margin without the yellowing, warping, or clip degradation that plagues plastic alternatives.
The material's natural resistance to UV exposure is the standout advantage. Powder-coated or anodised aluminium finishes hold their colour year after year, even on sun-drenched elevations. You will not face that frustrating scenario where the cover has turned cream while the frame beside it stays crisp white or anthracite grey.
Aesthetically, aluminium covers suit the slim, flush-profile window designs that are increasingly popular on modern builds and refurbishments. Because the material is inherently stronger than plastic at thinner cross-sections, manufacturers can produce covers with narrower profiles that sit almost flush with the frame line rather than protruding from it. The result is a cleaner, more contemporary look that complements aluminium and hybrid window systems particularly well.
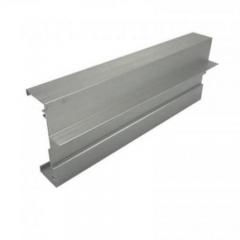
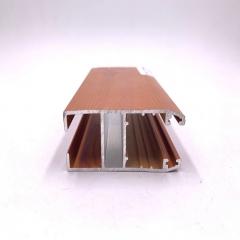
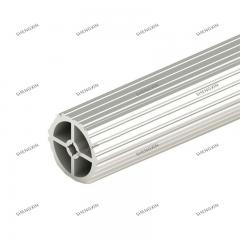
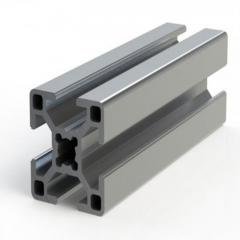
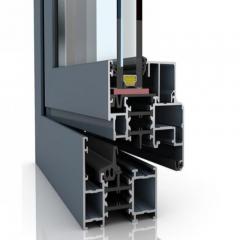
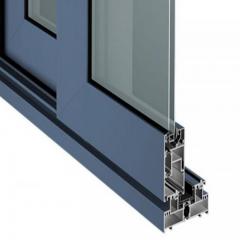
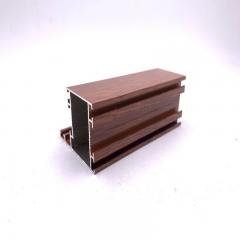
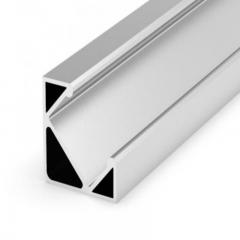
Compatibility is worth a closer look here. Aluminium covers are the natural pairing for aluminium window frames, where thermal expansion rates between cover and frame match, gaskets seal correctly, and the overall visual language stays cohesive. Suppliers such as Shengxin Aluminium offer a full range of standard and custom slot vents designed specifically for aluminium-frame integration, including flush-profile options that sit neatly within the frame line. Their catalogue covers a variety of standard dimensions as well as bespoke sizing for non-standard frames — a useful resource if your measurements do not align with off-the-shelf products.
The one genuine drawback is cost. Aluminium covers carry a higher upfront price than uPVC equivalents. However, when you factor in the extended lifespan and the fact that you are unlikely to need a second replacement during your time in the property, the per-year cost often works out lower. For homeowners weighing a trickle vent cover material comparison on value rather than sticker price alone, aluminium consistently comes out ahead.
Timber trickle vent cover options are the go-to choice for period properties, listed buildings, and conservation-area homes where matching the window frame material is an aesthetic or regulatory requirement. These covers are typically machined from hardwood or engineered timber, then primed and painted to match the frame colour precisely.
The visual result can be beautiful — a seamlessly colour-matched cover that blends into the frame line so naturally you barely notice it is there. Timber window specialists have developed vent systems where the internal cover sits flush against the frame and is finished in the same colours as the window itself, including dual-colour options for frames with different interior and exterior finishes.
The maintenance burden, however, is higher. Timber covers need periodic repainting or re-staining to maintain their appearance and protect against moisture ingress. In humid rooms like kitchens and bathrooms, paint can peel or blister if the cover is not adequately sealed. And unlike aluminium or even uPVC, timber is susceptible to swelling and contraction with seasonal humidity changes, which can cause covers to stick in their housings during damp months and rattle slightly when conditions dry out.
If you own a timber-framed property and value that traditional aesthetic, timber covers are the right match — just budget for the ongoing upkeep they require. For everyone else, the practical advantages of uPVC or aluminium will typically deliver a better balance of appearance, durability, and ease of ownership.
Material choice shapes how your cover looks and how long it lasts, but it does not tell the whole story. The design of the cover itself — its slot pattern, slider mechanism, and internal structure — plays an equally important role in how well your vent actually performs once it is fitted.
It is easy to think of a trickle vent cover as nothing more than a decorative strip — a piece of trim that hides the slot and keeps dust out. In reality, the cover is a functional component whose design directly shapes how much fresh air enters your room and how much external noise comes along with it. Two covers made from the same material, in the same length, can deliver noticeably different trickle vent cover airflow performance simply because their slot patterns, slider geometries, and internal structures differ. Understanding these design details puts you in control of a comfort trade-off most homeowners never realise they are making.
Every trickle vent cover has a pattern of slots or openings cut through its face. When the slider is in the open position, air passes through those slots, travels through the housing channel, and enters your room. The combined open area of those slots — adjusted for the aerodynamic drag they create — is expressed as the equivalent area (EA), measured in square millimetres.
Sounds technical? Think of it this way. EA tells you how much air a vent can deliver under a given pressure difference. A cover rated at 5,000 mm² EA allows the same volume of airflow as a perfectly circular hole roughly 80 mm across. Building regulations use EA values to specify minimum ventilation for each room type — for example, habitable rooms in a multi-storey home typically require at least 8,000 mm² EA spread across multiple vents.
The cover's slot count, individual slot width, and total slot area all feed into that EA figure. A cover with numerous narrow slots may achieve the same EA as one with fewer but wider openings, yet the two will feel different in practice. Narrow slots tend to diffuse incoming air more evenly across the room, reducing perceptible draughts. Wider slots let air enter in more concentrated streams, which can feel cooler on still winter days — even though the total volume of air is identical.
The slider position adds another layer of control. Most covers use a hit-and-miss slider that lets you fully open, partially restrict, or completely close the slots. At partial positions, the slider overlaps some openings while leaving others clear, effectively reducing the EA on demand. This is how you fine-tune background ventilation season by season without removing or replacing anything.
Here are the key design features that influence a cover's real-world performance:
The practical takeaway is straightforward. A cover with a larger open EA lets more air exchange happen — great for stuffy rooms, essential for meeting ventilation regulations — but that wider-open pathway also admits more external sound. This is the fundamental trade-off that acoustic covers are engineered to address.
If you live near a busy road, a railway line, or under a flight path, you have probably noticed that your standard vent cover lets sound travel through almost as freely as air. That is because a typical cover's straight-through slot pattern offers virtually no resistance to sound waves. An acoustic trickle vent cover changes the equation by introducing internal baffles or labyrinth-style channels that force sound waves to bounce through multiple turns before reaching your room.
Each turn absorbs a portion of the sound wave's energy. Industry testing shows that well-designed acoustic covers can achieve weighted sound reduction indices (Dn,e,w) ranging from around 29 dB for entry-level models up to 42 dB or higher for premium units — while still maintaining enough EA to satisfy Part F ventilation requirements. To put those figures in perspective, a 10 dB reduction sounds roughly half as loud to human ears, so even a modest acoustic upgrade delivers a perceptible improvement in indoor comfort.
Here is the detail most guides overlook: the acoustic performance of a trickle vent system is largely determined by the cover and canopy design rather than the housing alone. The housing is simply a channel through the frame. It is the cover's internal geometry — the number of baffle turns, the density of sound-absorbing material, and the tightness of the labyrinth path — that does the heavy lifting on noise reduction. This means swapping a standard cover for a noise reducing trickle vent cover on the same housing can be a meaningful upgrade path for noise-sensitive homeowners, without the cost and disruption of ripping out and replacing the entire vent assembly.
The trade-off mirrors the airflow discussion above. Those baffled chambers that attenuate sound also create friction that restricts air movement, so an acoustic cover's EA is typically 10 to 20 percent lower than a standard cover of the same external dimensions. In most residential settings that reduction is well within acceptable limits, but if your room already sits at the minimum ventilation threshold, you may need to compensate by adding a second vent or stepping up to a longer cover size.
Selecting the right trickle vent cover equivalent area alongside the right acoustic rating is a balancing act — one that becomes much simpler once you understand the mechanics behind both numbers. The real question for most homeowners is not whether design matters, but how to physically swap an old cover for a better one without damaging the housing underneath.
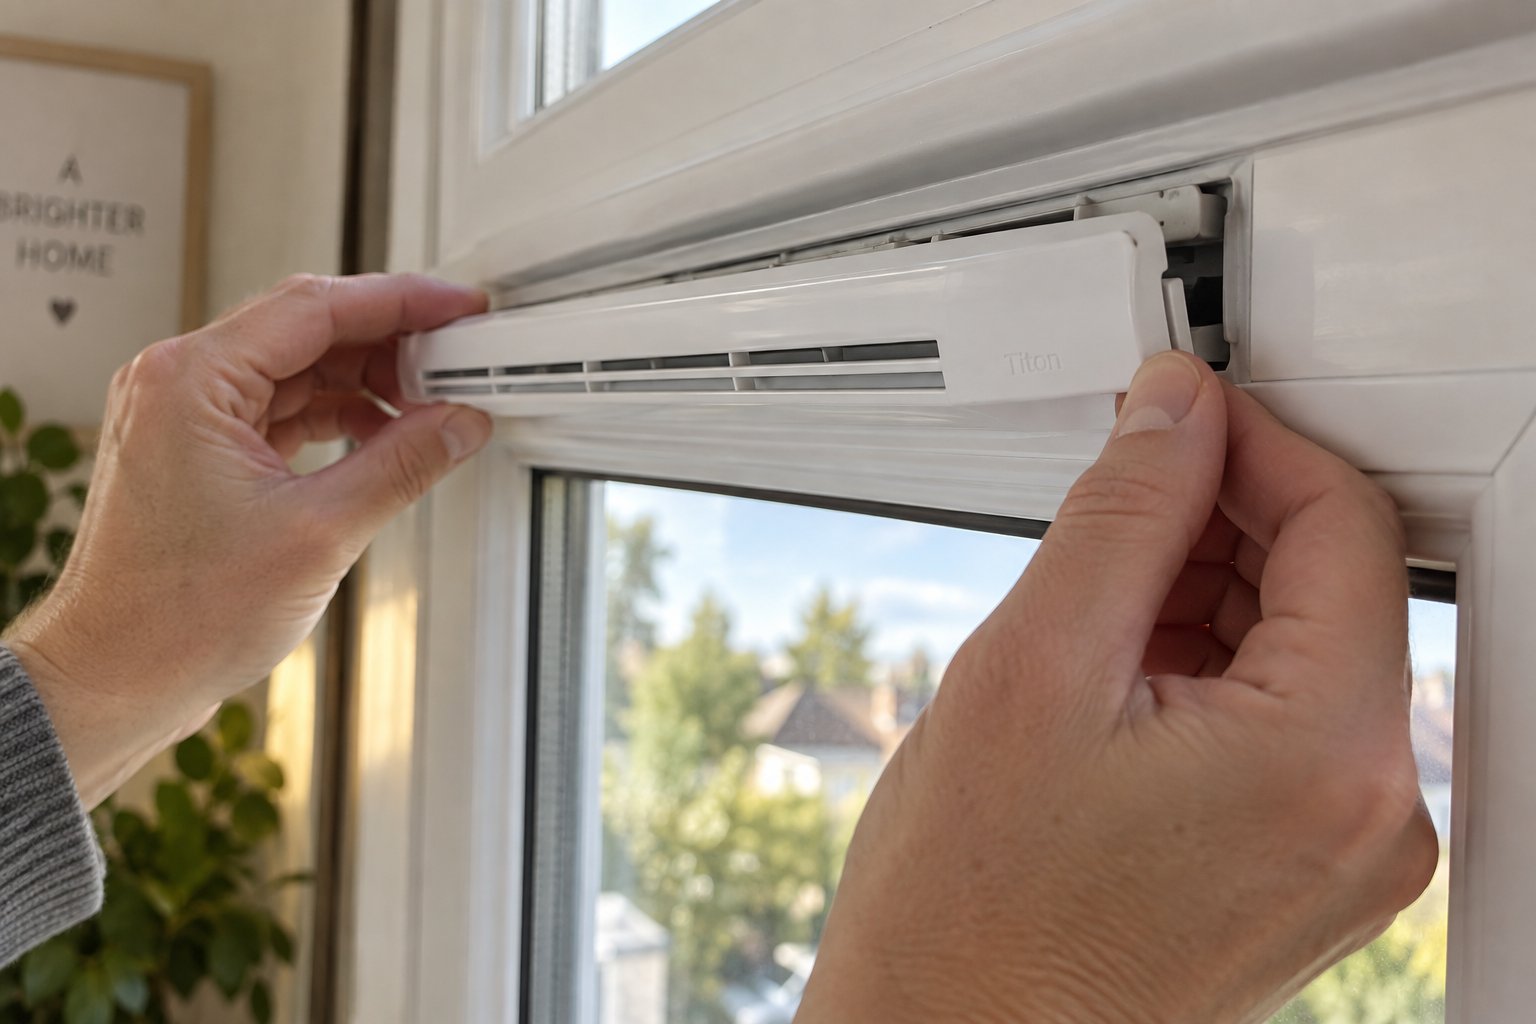
Good news: fitting a new trickle vent cover DIY is one of the simplest home maintenance tasks you will ever tackle. No specialist tools, no call to a tradesperson, no disruption to the window itself. The entire process — removal, cleaning, and refitting — takes under five minutes per window once you know the sequence. Yet clear, step-by-step guidance on how to actually do it is surprisingly hard to find. Let's fix that.
Before you touch anything, identify which attachment method your cover uses. The vast majority of domestic trickle vent covers clip into the housing — small plastic or metal tabs on the underside snap into corresponding receivers along the housing channel. A smaller number slide laterally into grooved tracks at each end of the housing. And occasionally, particularly on older timber frames, you will encounter covers held in place by one or two small screws. Knowing the method upfront prevents you from pulling when you should be pressing, or prying when you should be sliding.
Removing the old cover without damaging the housing is the critical first move. A cracked housing slot means you are no longer looking at a simple cover swap — you are looking at a full vent replacement. Take it slowly, and follow these steps in order.
Set the old cover aside. If it is still intact, keep it as a reference for size comparison when sourcing the replacement — even a yellowed or scratched cover provides useful dimensional data.
With a clean housing and a correctly sized replacement in hand, the fitting process is straightforward. Here is how to replace a trickle vent cover cleanly on the first attempt.
The whole fitting process — from alignment to slider test — takes about 30 seconds per cover. No adhesive, no drilling, no shimming. That simplicity is by design: manufacturers engineer trickle vent cover clip replacement to be a homeowner-level task precisely because covers are consumable components that need periodic swapping over the life of the window.
Most replacements go smoothly, but a handful of issues crop up often enough to warrant a quick troubleshooting guide.
If you have worked through every step above and the cover still will not fit or function correctly, the issue may lie with the housing itself rather than the cover. Warped, cracked, or paint-clogged housings occasionally need professional attention or full replacement — but that scenario is the exception, not the rule.
A correctly fitted cover should sit securely for years with minimal attention. Minimal, however, does not mean zero — and a little routine maintenance goes a long way toward keeping both the cover and the vent channel performing as they should.
You know how to fit a new cover in under a minute. But what if the cover you already have is perfectly intact — just grimy, spotted with dark mould, or coated in a thin film of kitchen grease? Replacing something that only needs a good clean is a waste of money. A simple seasonal maintenance routine keeps your covers looking fresh, your vent channels clear, and your background ventilation running at full capacity for years longer than a neglected set ever could.
The problem builds slowly. Dust and airborne particles settle on the cover surface and inside the slider channel every day. In kitchens, cooking oils create a sticky film that traps even more grime. In bathrooms and utility rooms, humid air encourages mould spores to colonise the damp edges of the slot. Ventilation specialists note that blocked or dirty vents are functionally no better than having no vent at all — the first visible sign of trouble is usually condensation forming on the window glass, by stuffy indoor air and, eventually, mould growth around the frame itself. None of that has to happen if you spend five minutes per window a couple of times a year.
How do you clean a trickle vent cover properly without damaging the clips or housing? The process is deliberately simple — no specialist products, no tools beyond what you already have under the kitchen sink.
How often should you repeat this? A good rule of thumb is every time you clean your windows, or at minimum twice a year — once in spring and once in autumn. Homes in urban areas or near busy roads may need more frequent attention, since airborne particulates accumulate faster in those environments.
Here is a quick maintenance checklist you can save or print for reference:
Routine cleaning handles everyday grime, but three specific problems require a slightly different approach.
Mould on trickle vent covers. Bathroom and kitchen covers are the usual culprits. You will spot it as dark grey or black speckling along the edges of the slot openings or inside the slider track. A diluted white vinegar solution — roughly one part vinegar to four parts water — is effective at killing surface mould without the harsh chemical smell of bleach-based cleaners. Soak the cover in the vinegar solution for 20 minutes, scrub with a soft brush, rinse, and dry thoroughly. For persistent mould, a second soak usually does the job. Going forward, keeping the slider in the open position during humid months helps prevent moisture from pooling inside the housing, starving mould spores of the damp environment they need to take hold.
Condensation staining on internal faces. When warm, moist indoor air meets a cold cover surface, condensation can form and leave mineral deposits or watermarks on the inner face. These stains are cosmetic rather than functional, but they look unsightly. A wipe with a damp cloth and a tiny amount of white vinegar usually lifts them. If mineral deposits have built up over years, a non-scratch cream cleaner applied with a soft cloth can help — but test it on an inconspicuous area first to make sure it does not dull the finish.
UV discolouration — the yellowing fix question. This is the one problem cleaning cannot solve. If your white uPVC covers have turned yellow or cream from prolonged sun exposure, the discolouration is a chemical change within the polymer itself. No product, no home remedy, and no amount of scrubbing will reverse it. The only trickle vent cover yellowing fix is replacement. Aluminium covers and properly painted timber covers are far less susceptible to this issue — powder-coated aluminium, in particular, holds its colour for decades without fading. If UV yellowing is a recurring frustration, switching to an aluminium or pre-finished cover on your next replacement cycle eliminates the problem permanently.
A clean, well-maintained cover does more than just look better on the frame. It ensures the vent delivers its full rated airflow, prevents moisture-related damage to the housing beneath, and extends the interval between replacements. Yet even the best-maintained cover still sits within a broader visual context — the colour and finish of your window frame. When a replacement cover is the right call, matching it to that frame is the difference between a seamless repair and an eyesore that draws attention every time you glance at the window.

Imagine spending hundreds of pounds on sleek anthracite grey windows only to have a strip of yellowed white plastic sitting across the top of every frame. It is a small detail — but it is the kind of small detail that catches your eye every single day. Colour matching trickle vent covers to windows is one of the fastest, cheapest ways to sharpen your home's appearance without touching the glass, the frame, or the vent mechanism itself. You are swapping one clip-on component for another that simply looks like it belongs.
The visual payoff is surprisingly large. A mismatched or discoloured cover draws attention precisely because it breaks the clean, continuous line of the window frame. Replace it with a cover that mirrors the frame's colour and finish, and the vent virtually disappears — which, from a design standpoint, is exactly what you want. Background ventilation hardware should stay in the background.
The days of choosing between white and brown are long gone. Today's trickle vent cover colour options span a wide palette, and the most popular finishes align closely with the frame colours dominating modern window installations across the UK.
For homeowners upgrading from dated white covers, anthracite grey and black finishes deliver the most dramatic transformation. A single cover swap on each window — five minutes of work, as you saw in the fitting chapter — can make a ten-year-old window line look freshly installed.
Eyeballing colour in a hardware store almost never works. Lighting conditions, screen calibrations, and subtle batch variations mean that two products labelled "grey" can look noticeably different once they sit side by side on your frame. The reliable method is to match RAL numbers.
RAL is a standardised colour-matching system used across the European manufacturing industry. Every powder-coated aluminium frame, foil-wrapped uPVC profile, and factory-painted timber window ships with a specific RAL code in its specification sheet. When you order a cover in the same RAL code, you get a factory-verified colour match — not an approximation, but a controlled, repeatable finish that aligns precisely with your frame.
How do you find your frame's RAL code? Start with the window manufacturer's documentation. Installation paperwork, guarantee certificates, or product labels on the frame itself often list the RAL number. If those documents are lost, contact the window manufacturer or installer with photos of the frame and they can usually confirm the code. Failing that, a RAL colour fan deck — available online for under ten pounds — lets you hold physical colour chips against your frame until you find an exact match.
Major vent hardware manufacturers have responded to the demand for colour consistency. Titon, for example, now offers RAL colour-matched ventilators, canopies, grilles, and end caps across its plastic and metal ranges — including the option to specify different colours internally and externally. That dual-colour capability is especially useful for projects where external frames must meet planning or streetscape requirements while internal finishes follow a separate design scheme.
What if your frame uses a non-standard or heritage colour that falls outside the common RAL palette? Some suppliers offer custom colour matching for bespoke finishes. This is particularly valuable for listed buildings, conservation-area properties, or architecturally distinctive homes where planning conditions dictate a specific colour. Custom matching typically adds lead time and a modest premium to the order, but it ensures the cover integrates seamlessly with a frame finish that off-the-shelf options simply cannot replicate.
One practical tip worth remembering: if you are replacing covers on multiple windows, order all of them from the same supplier in the same batch. Even within the same RAL code, microscopic variations between production runs can create visible differences when covers from separate batches sit on adjacent windows in direct sunlight. A single-batch order eliminates that risk entirely.
Colour and finish bring your replacement cover into visual harmony with the window frame — but before you commit to a purchase, there is one more dimension worth understanding. Building regulations have specific rules about whether you can block, seal, or permanently remove a trickle vent, and those rules affect which cover options are genuinely open to you.
Draughty rooms, traffic noise creeping through the slot, a vent that whistles on windy nights — the temptation to block, seal, or permanently remove a trickle vent cover is real. Plenty of homeowners have done exactly that, stuffing foam strips into the housing or taping over the slot entirely. But before you reach for the duct tape, you need to understand where the law draws the line. Trickle vent building regulations in the UK are surprisingly specific, and getting on the wrong side of them can create headaches that far outweigh a little draught.
Approved Document F of the Building Regulations in England sets out the ventilation requirements for all dwellings. Its core purpose is to prevent the "sealed box" effect — modern, energy-efficient homes are so airtight that moisture, pollutants, and stale air become trapped without a reliable means of air exchange. Trickle vents are one of the primary approved methods for delivering what the regulations call "background ventilation": a constant, low-level supply of fresh air that operates passively, without relying on the occupant to open a window.
The minimum ventilation targets are expressed in equivalent area (EA) and vary by room type and building configuration. Habitable rooms and kitchens in multi-storey dwellings require at least 8,000 mm² EA, while the same rooms in single-storey properties such as bungalows and flats need 10,000 mm² EA. Bathrooms require a minimum of 4,000 mm² EA regardless of property type. These are not suggestions — they are mandatory thresholds that must be met for a building to comply with Part F.
Background ventilation must be maintained in occupied dwellings. Permanently blocking or removing the means of background ventilation — including trickle vent covers — can place a property in breach of Approved Document F of the Building Regulations.
The regulations also apply directly to the replacement window market. If your old windows had trickle vents fitted, any new windows must provide at least the same EA — never less. And if the originals had no vents at all, current rules now require them to be added during replacement to bring the property up to present-day Part F standards. The direction of travel is clear: more ventilation, not less.
Here is the distinction that trips people up. Can you block a trickle vent cover by sliding it into the closed position? Absolutely. That is the entire purpose of the slider mechanism — it gives you day-to-day control over airflow. Closing the vent on a cold, windy evening and reopening it when conditions improve is normal, expected use. The regulations account for it.
What crosses the line is permanently sealing, blocking, or physically removing the vent so that background ventilation can no longer function as designed. Stuffing the housing with foam, gluing the cover shut, applying silicone sealant across the slot, or removing the cover and blanking off the opening — all of these actions eliminate the building's ability to ventilate passively. Is it legal to remove trickle vent covers permanently? In the eyes of a building inspector, doing so renders the property non-compliant with Part F.
The practical consequences may not be immediate — no one is going to knock on your door to check. But non-compliance tends to surface at the worst possible time: during a property sale, a remortgage survey, a landlord safety inspection, or a building insurance claim related to damp and mould. A surveyor who spots sealed or missing vents can flag the property as non-compliant, potentially delaying transactions or requiring remedial work before completion.
It is also worth knowing that trickle vent blanking plates do exist as a product category. These are flat, solid covers designed to seal the housing slot completely. However, they are intended for temporary use during construction — for example, to keep dust and plaster out of the vent channel while building work is underway. They are not approved as permanent replacements for a functioning trickle vent cover. Installing one as a long-term fix puts you in the same compliance position as sealing the vent with tape or foam.
The bottom line is refreshingly simple. Close the slider whenever you like — that is your right as the occupant. But keep the cover in place, keep it functional, and keep the option to open it available. The regulations do not demand that you ventilate every hour of every day; they demand that the means of ventilation remains intact and operable.
With the regulatory picture clear, the final step is pulling every thread together — size, material, colour, acoustic performance, and compliance — into a single, practical buying checklist that ensures your next replacement cover ticks every box.
You have measured the housing, identified the frame material, weighed up colour options, considered whether acoustic performance matters, and confirmed that building regulations require the vent to remain functional. That is a lot of ground to cover — and it is easy for one detail to slip through the cracks when you are actually standing at your window with a tape measure and a browser full of open tabs. This final section distils every decision point into a single, actionable trickle vent cover buying guide so you can order the right part the first time and avoid the frustrating returns loop that catches so many homeowners.
Think of this as your pre-purchase quality gate. Work through each step in order, and by the time you reach the bottom, you will have every specification you need to match a replacement cover to your window with confidence.
Run through those five steps and you will have a clear specification sheet: length, width, clip configuration, material, colour code, acoustic rating (if applicable), and minimum EA. That specification is your shopping list — and it makes comparing products across different suppliers fast and objective rather than guesswork.
Where you buy matters almost as much as what you buy. The best replacement trickle vent cover for your project depends on whether you need a standard off-the-shelf part, an aluminium-profile cover for a modern frame system, or a fully custom solution for a non-standard size or finish. Each sourcing route has distinct strengths and limitations.
| Cover Type | Best For | Key Considerations | Typical Lead Time |
|---|---|---|---|
| Aluminium custom and standard slot vent covers | Aluminium-frame windows, flush-profile systems, projects requiring custom dimensions or RAL colour matching | Suppliers like Shengxin Aluminium offer both standard and custom slot vents designed specifically for aluminium-frame integration, including flush-profile options that sit within the frame line. Their range covers standard domestic dimensions as well as bespoke sizing and finish options — a strong starting point for anyone sourcing a custom trickle vent cover for aluminium frames. | Standard sizes: 5–10 working days. Custom orders: 2–4 weeks depending on specification. |
| Standard off-the-shelf uPVC covers | Like-for-like replacement on uPVC window frames where the original brand and model are known | Widely stocked by online window hardware retailers and high-street DIY stores. Confirm the exact model number or housing type before ordering — "universal" covers rarely are. Price is low, but UV longevity is limited on white finishes. | Usually next-day or same-week delivery from UK stockists. |
| Custom-made or bespoke covers (any material) | Heritage properties, conservation areas, non-standard frame profiles, or dual-colour requirements | Typically sourced through specialist joinery suppliers or direct from vent manufacturers. Expect to provide detailed measurements, RAL codes, and sometimes a physical sample of the existing frame finish. Higher cost but essential where planning or aesthetic requirements rule out standard products. | 3–6 weeks depending on material and finish complexity. |
A few practical tips for wherever you decide to buy trickle vent covers:
Choosing the right replacement is not complicated once you break it down into these discrete steps. Measure carefully, match the material to your frame, confirm the colour, verify the airflow rating against regulations, and source from a supplier whose range covers your specific needs. Five decisions, five minutes of checking, and you end up with a cover that clips in cleanly, performs properly, and looks like it was always part of the window. That is the difference between a repair you notice every day and one you forget about the moment it is done.
Yes, in most cases you only need to replace the cover itself. The cover is a removable clip-on fascia that sits over the vent housing. If the housing channel routed into your window frame is undamaged and airflow passes through normally when the cover is removed, a new cover is all you need. This saves significant cost compared to a full vent unit replacement, since the housing and external canopy are engineered to last the lifetime of the window frame while the cover is designed as a user-serviceable, consumable component.
Trickle vent covers are not universal — they are brand-specific or system-specific. Common domestic covers range from approximately 260 mm to 412 mm in length, with 300 mm and 400 mm being the most popular UK sizes. To find the right fit, measure the total length of your existing cover (or the housing slot if the cover is missing) in millimetres, then record the clip-to-clip spacing and the width. These three measurements are essential for matching a compatible replacement, as even covers with the same total length can have different clip configurations.
Closing a trickle vent using its slider mechanism is perfectly legal and part of normal daily use. However, permanently sealing, blocking, or physically removing the vent so background ventilation can no longer function is a different matter. Approved Document F of the Building Regulations requires occupied dwellings to maintain operable background ventilation. Permanently disabling a trickle vent can render your property non-compliant, which may cause problems during property sales, remortgage surveys, landlord inspections, or insurance claims related to damp and mould.
UV yellowing on white uPVC covers is an irreversible chemical change within the polymer — no cleaning product or home remedy can restore the original colour. The only solution is replacement. To avoid the problem recurring, consider switching to aluminium covers with powder-coated or anodised finishes, which resist UV discolouration for decades. If you prefer to stick with uPVC, covers on south- and west-facing windows will yellow fastest, so budget for more frequent replacements on those elevations.
A standard cover has straight-through slot openings that allow air to pass freely but offer minimal resistance to sound waves. An acoustic cover incorporates internal baffles or labyrinth-style channels that force sound waves through multiple turns, absorbing energy at each stage. Well-designed acoustic models achieve sound reduction ratings from around 29 dB up to 42 dB or higher while still meeting Part F ventilation requirements. The trade-off is a 10 to 20 percent reduction in airflow capacity compared to a standard cover of the same size. Suppliers like Shengxin Aluminium offer aluminium-frame vent solutions that can accommodate both standard and acoustic configurations.



 un service en ligne
 0086 136 3563 2360
 sales@sxalu.com
 +86 136 3563 2360
 français
 English
 Deutsch
 русский
 español
 português
 العربية
 ไทย
ไทย Việt
Việt Українська